Signing in
Your administrator creates your account, then you sign in with your email and password.
There is no public sign-up — this keeps your business data private. If you forget your password, use the “Forgot password?” link on the sign-in screen to set a new one. Accounts can be marked as Admin (full access, including profit and user management) or Staff (day-to-day selling).
- Admins see profit, expenses and the Users area.
- Staff are limited to the businesses they are assigned to.
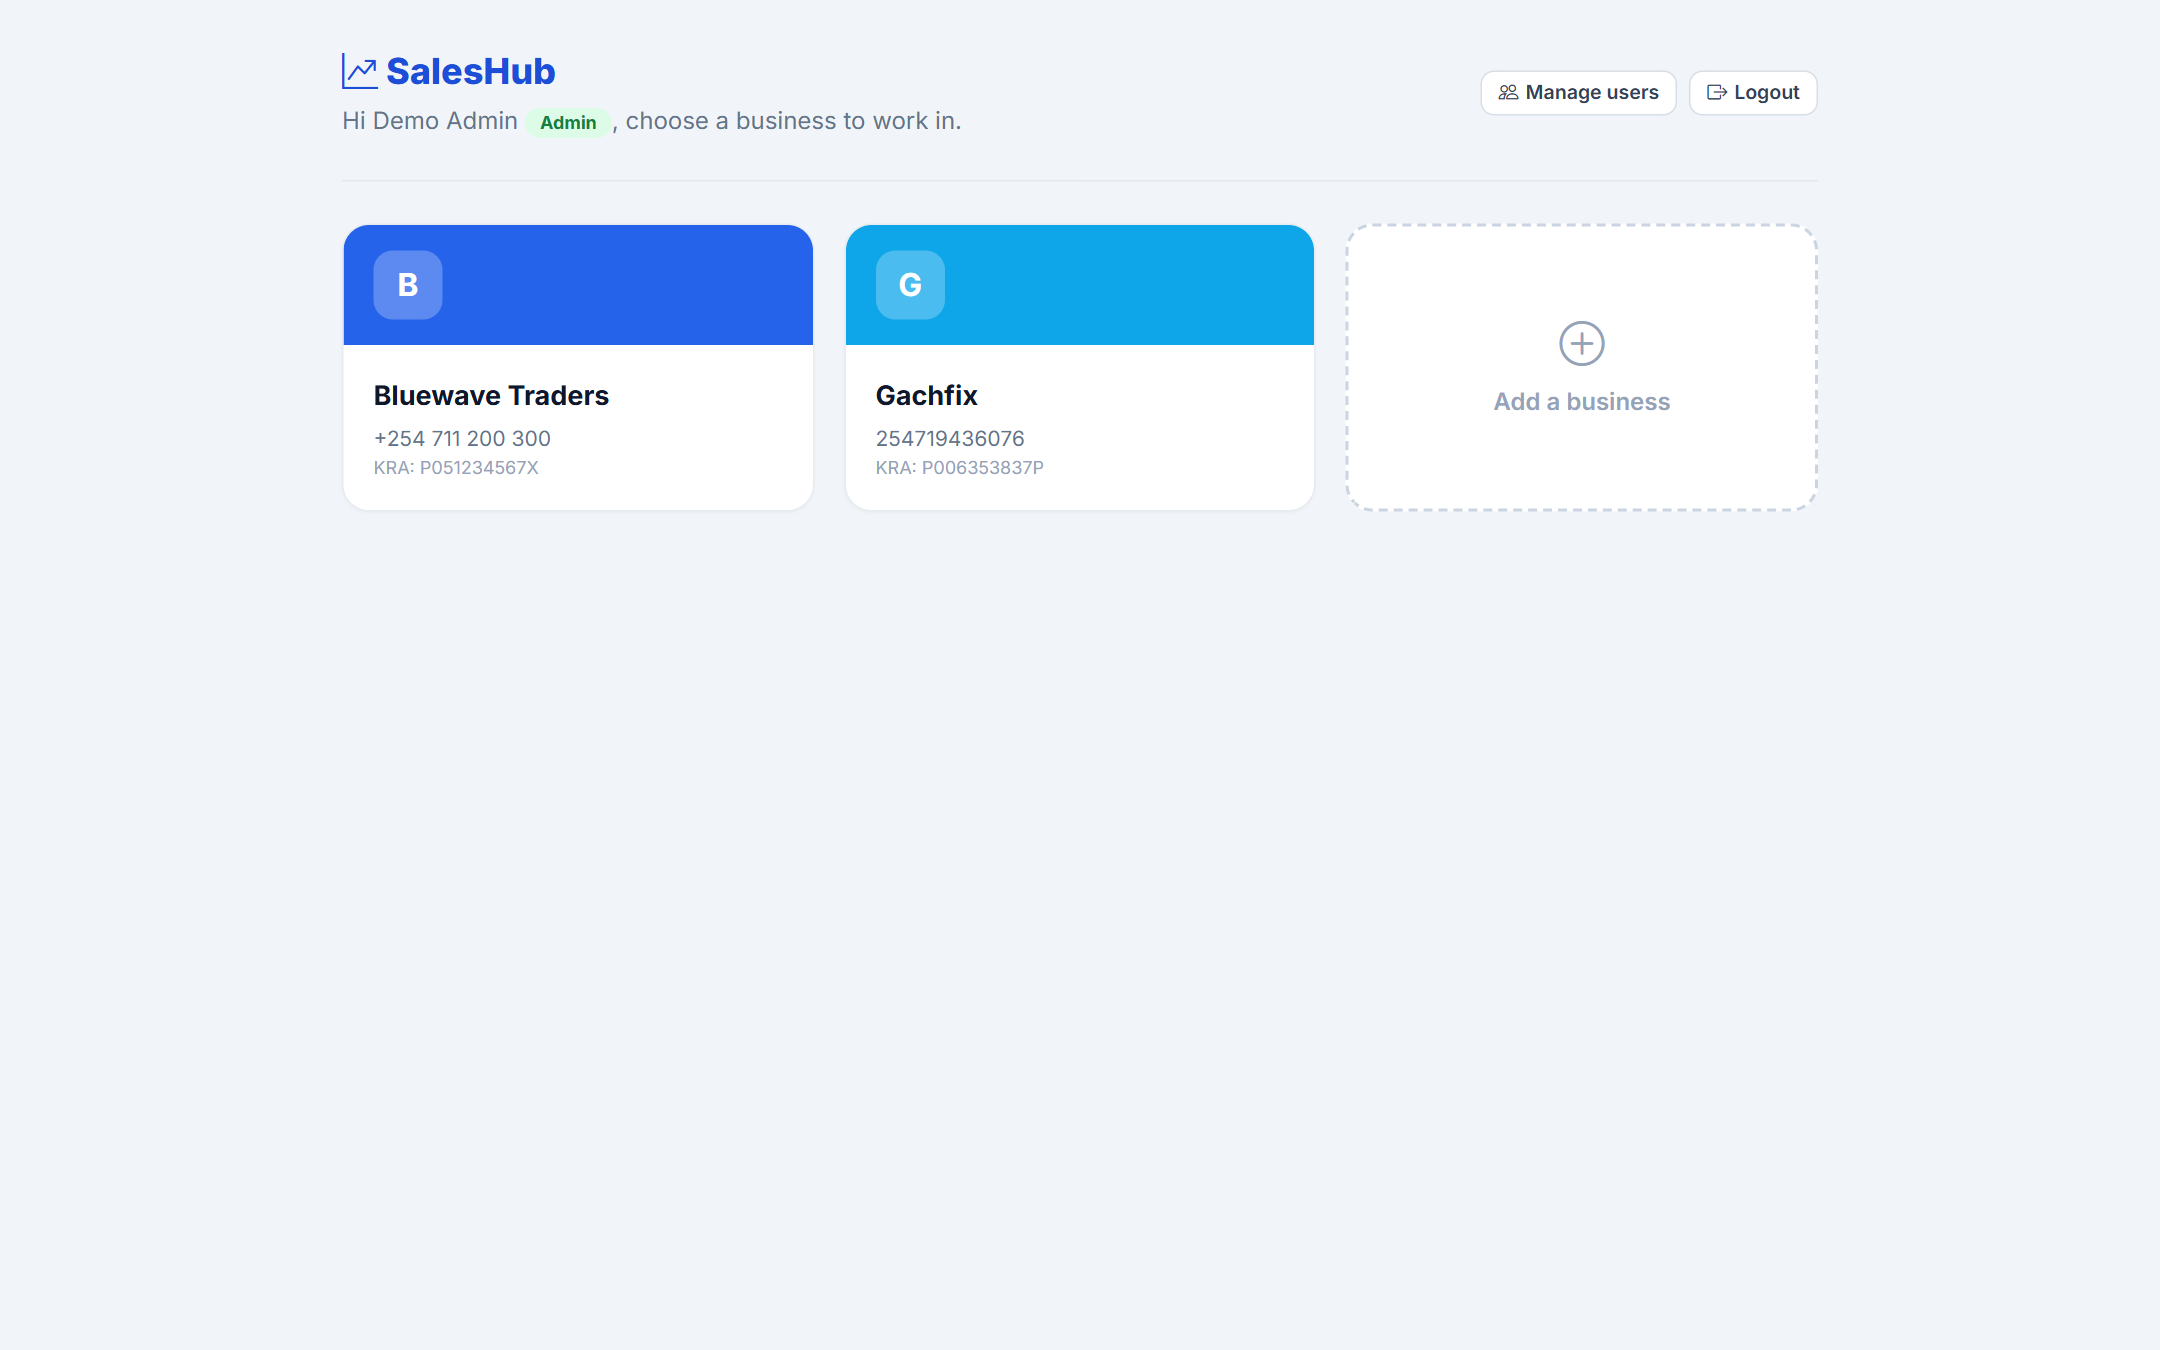
Choosing a business
SalesHub is multi-business. After signing in you pick which company workspace to enter.
Every business keeps its own products, customers, invoices and reports completely separate. Admins can create new businesses from here and switch between them at any time using Switch business in the sidebar.
- Each business has its own logo, KRA PIN, currency and brand colour.
- Use the brand colour to tell workspaces apart at a glance.
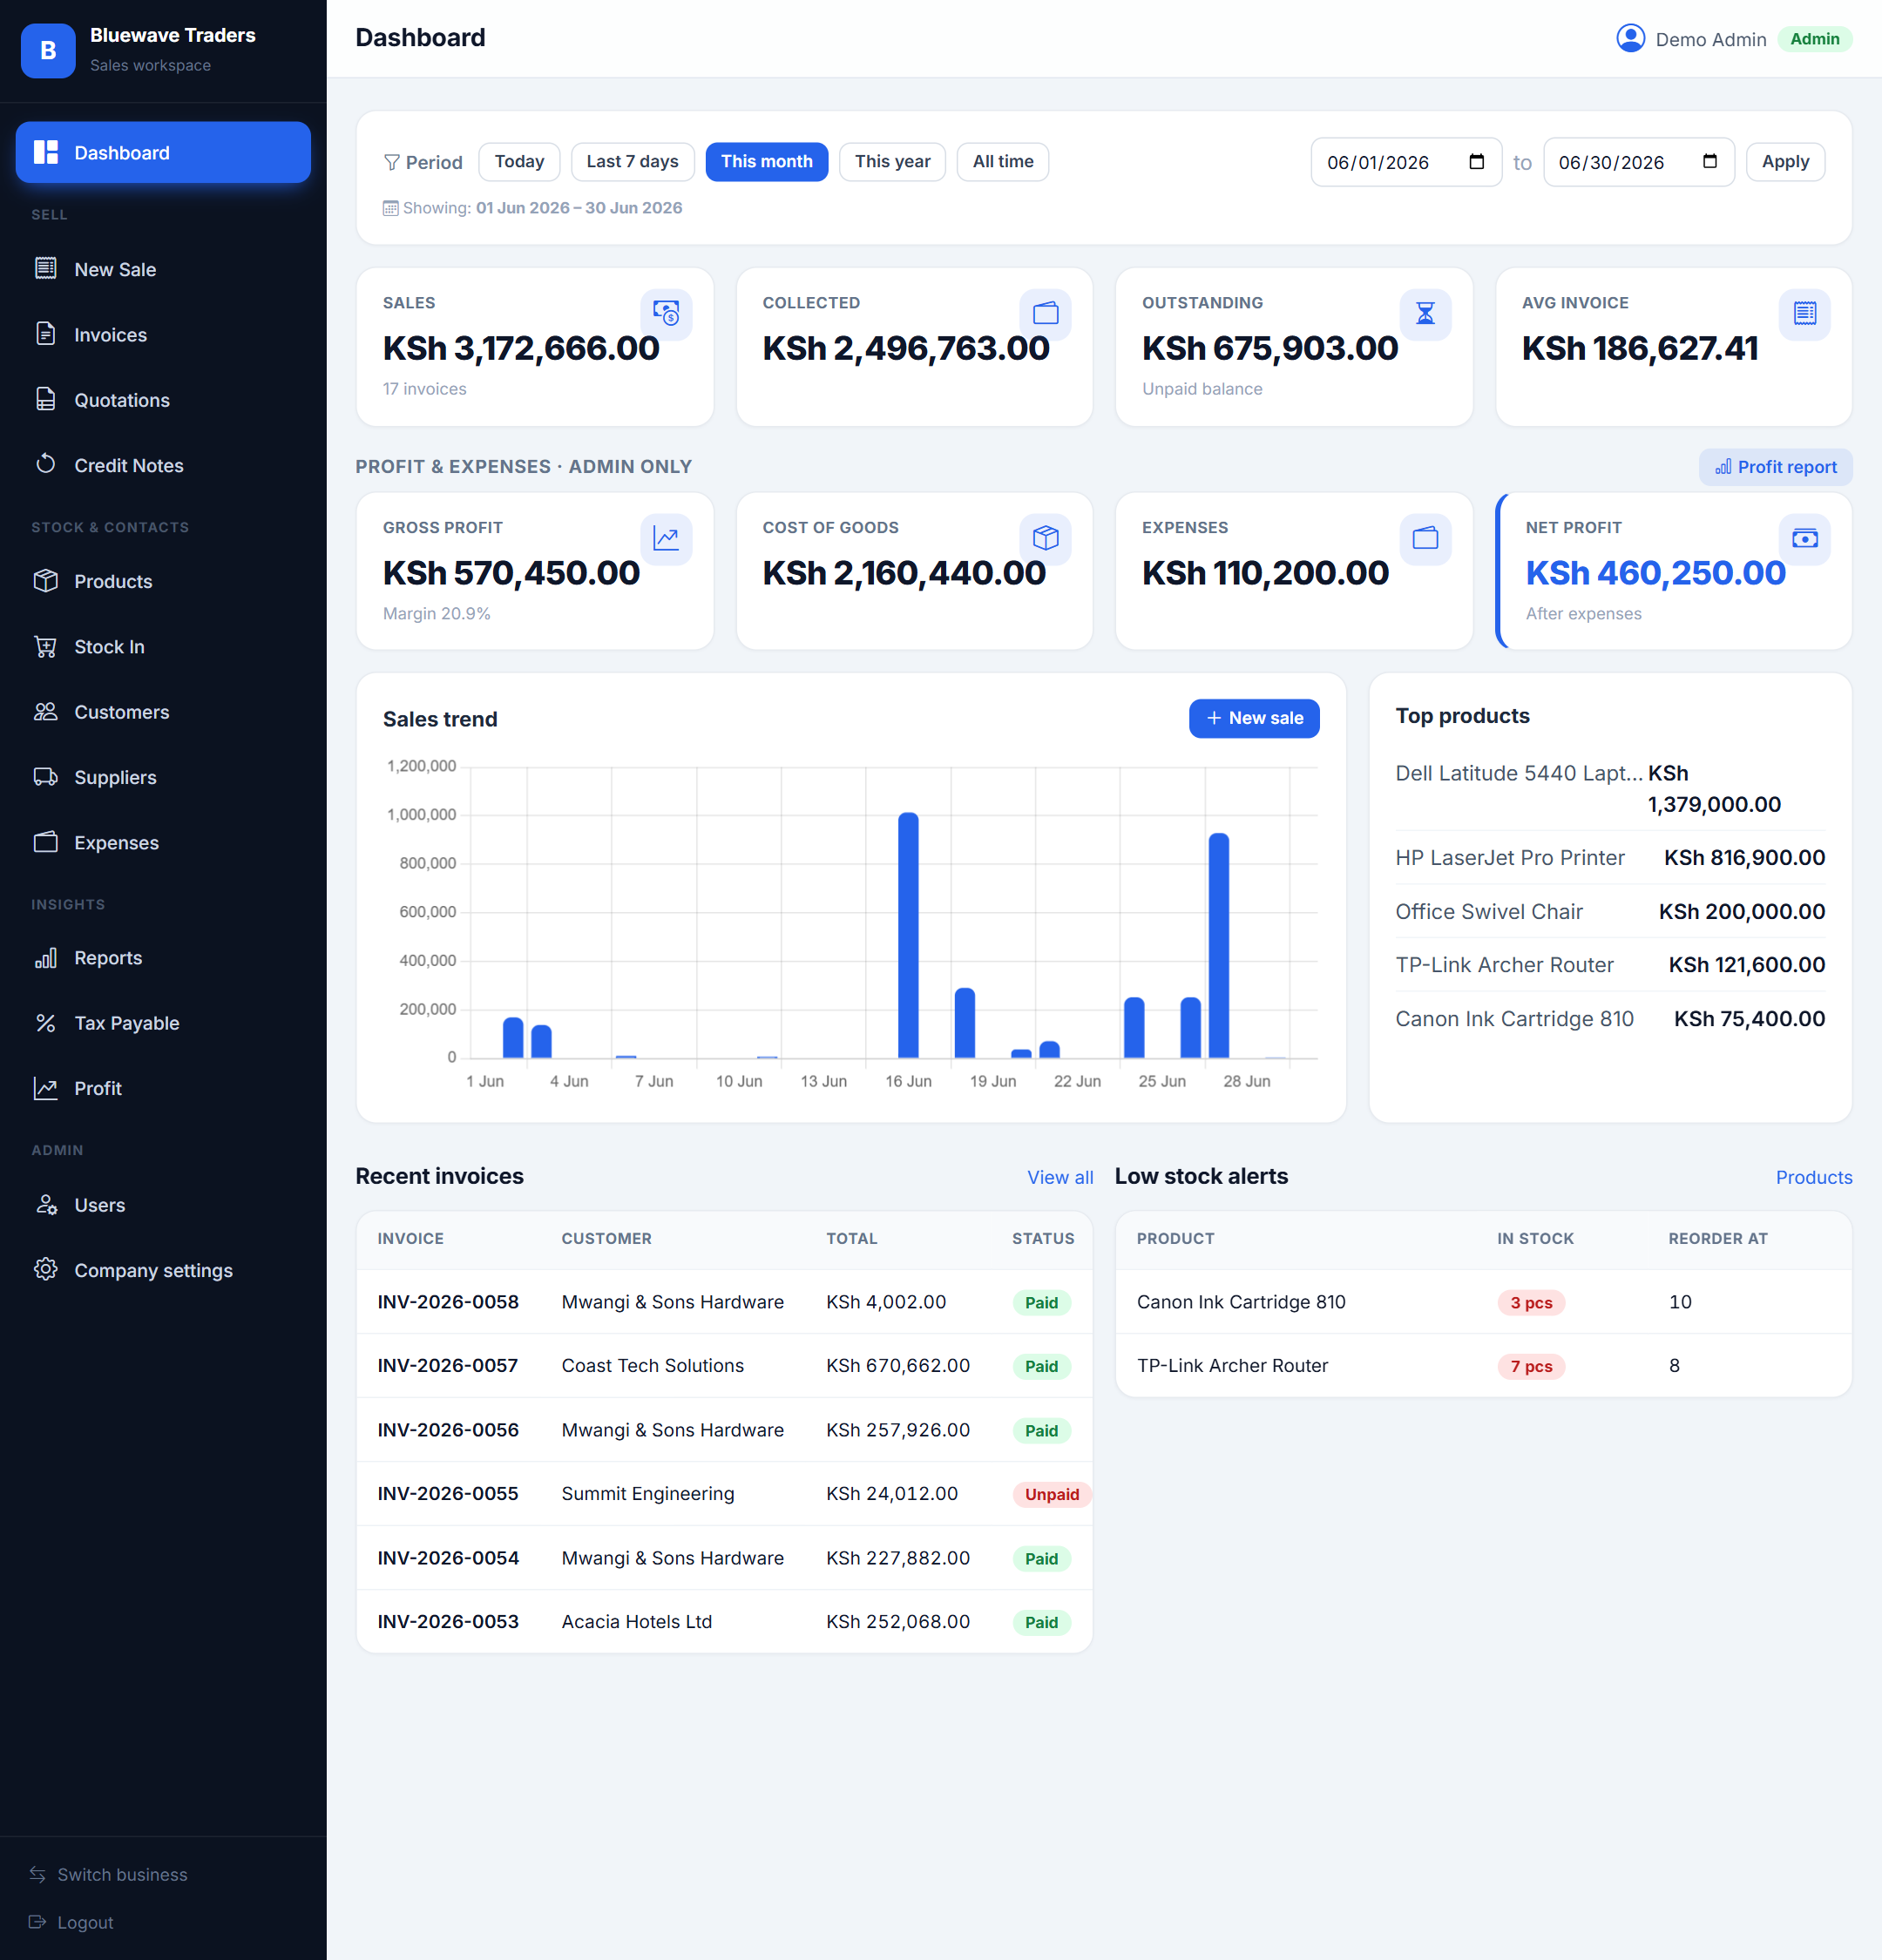
The Dashboard
Your command centre — sales, money collected, outstanding balances and trends at a glance.
Use the period filter at the top (Today, Last 7 days, This month, This year, All time, or a custom date range) to refocus every figure on the page. The Sales trend chart, Top products, Recent invoices and Low-stock alerts all update together. Admins also see a Profit & Expenses row with gross profit, cost of goods, expenses and net profit.
- Low-stock alerts warn you before you run out.
- Click any recent invoice to open it instantly.
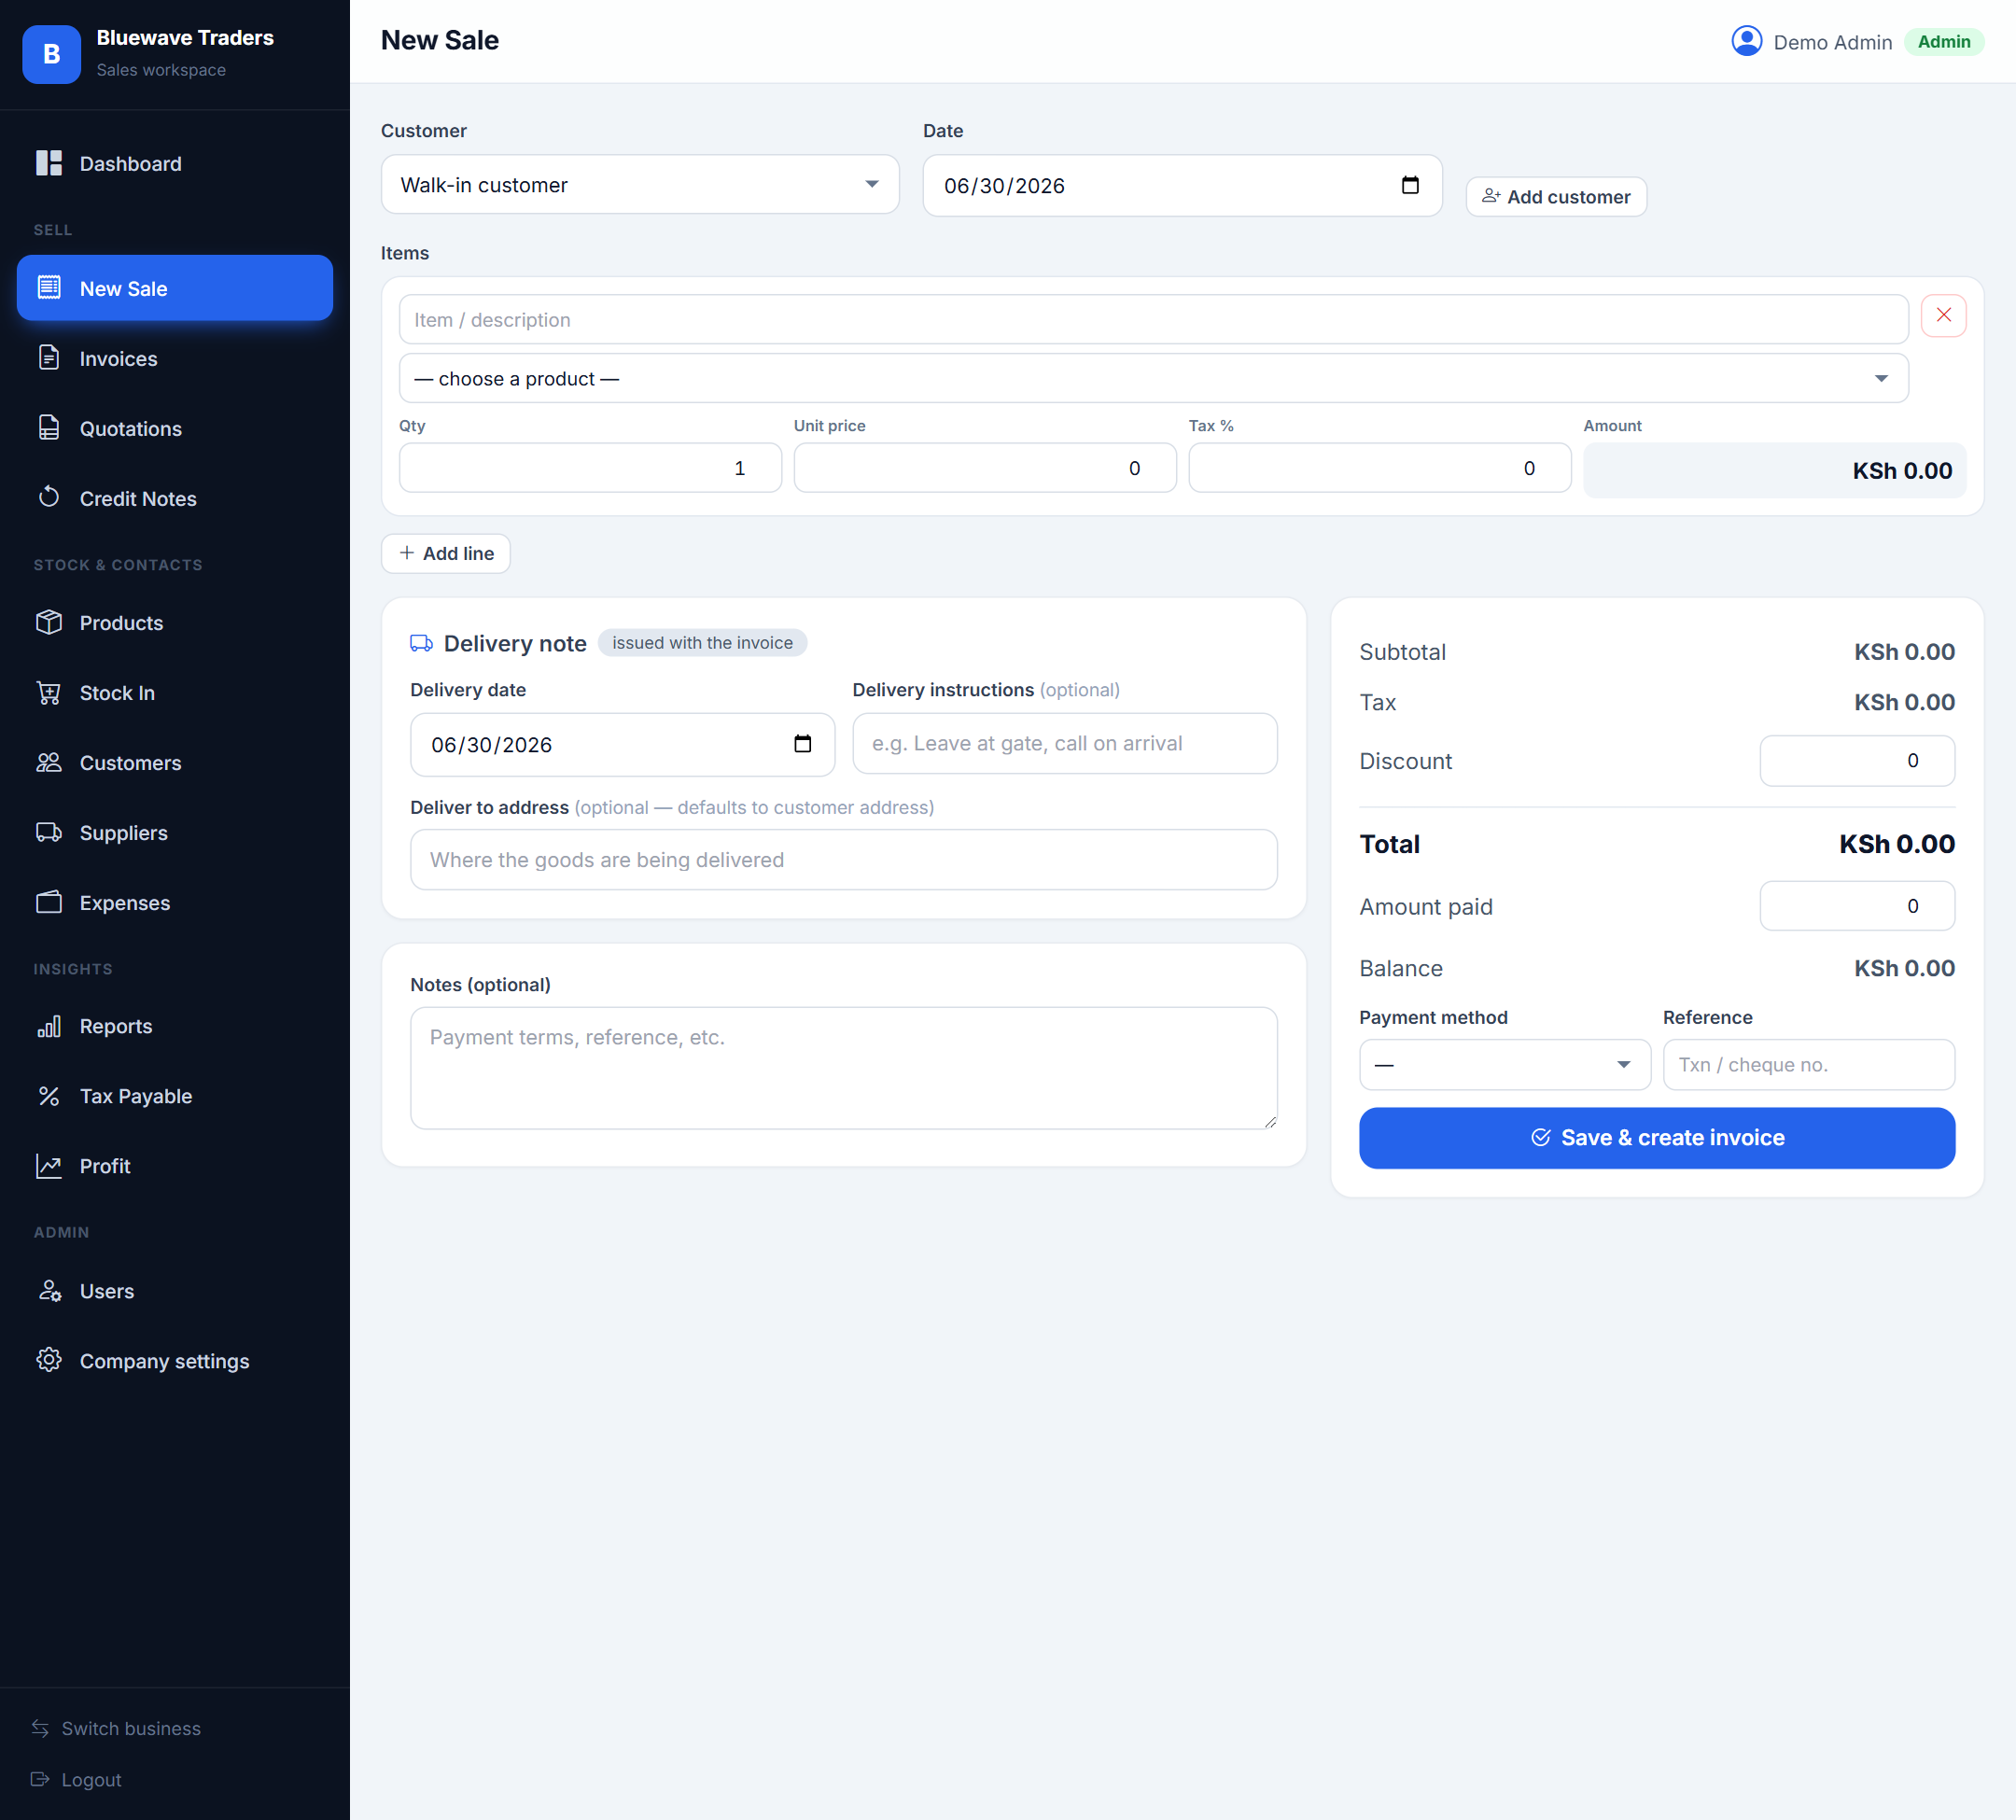
Making a sale
Create an invoice in seconds: choose the customer, add items, take payment.
Pick a saved product to auto-fill its price and tax, or type a free-text line. Add as many lines as you need, apply a discount, and record how much the customer paid — the status (Paid / Partial / Unpaid) is set automatically. You can also attach delivery details so a matching delivery note is ready alongside the invoice.
- “Walk-in customer” is fine when there is no saved contact.
- Record part-payments — the balance is tracked for you.
- Stock is reduced automatically when a sale is saved.
Invoices
Every sale becomes a searchable, branded invoice you can print or share as PDF.
The Invoices list shows numbers, customers, totals and payment status. Open any invoice to see the full branded document with your letterhead and KRA PIN, then use Print / Save PDF to share it. Each invoice can also generate a delivery note.
- Invoice numbers run in a single, gap-free series per business.
- Status badges make unpaid invoices easy to spot.

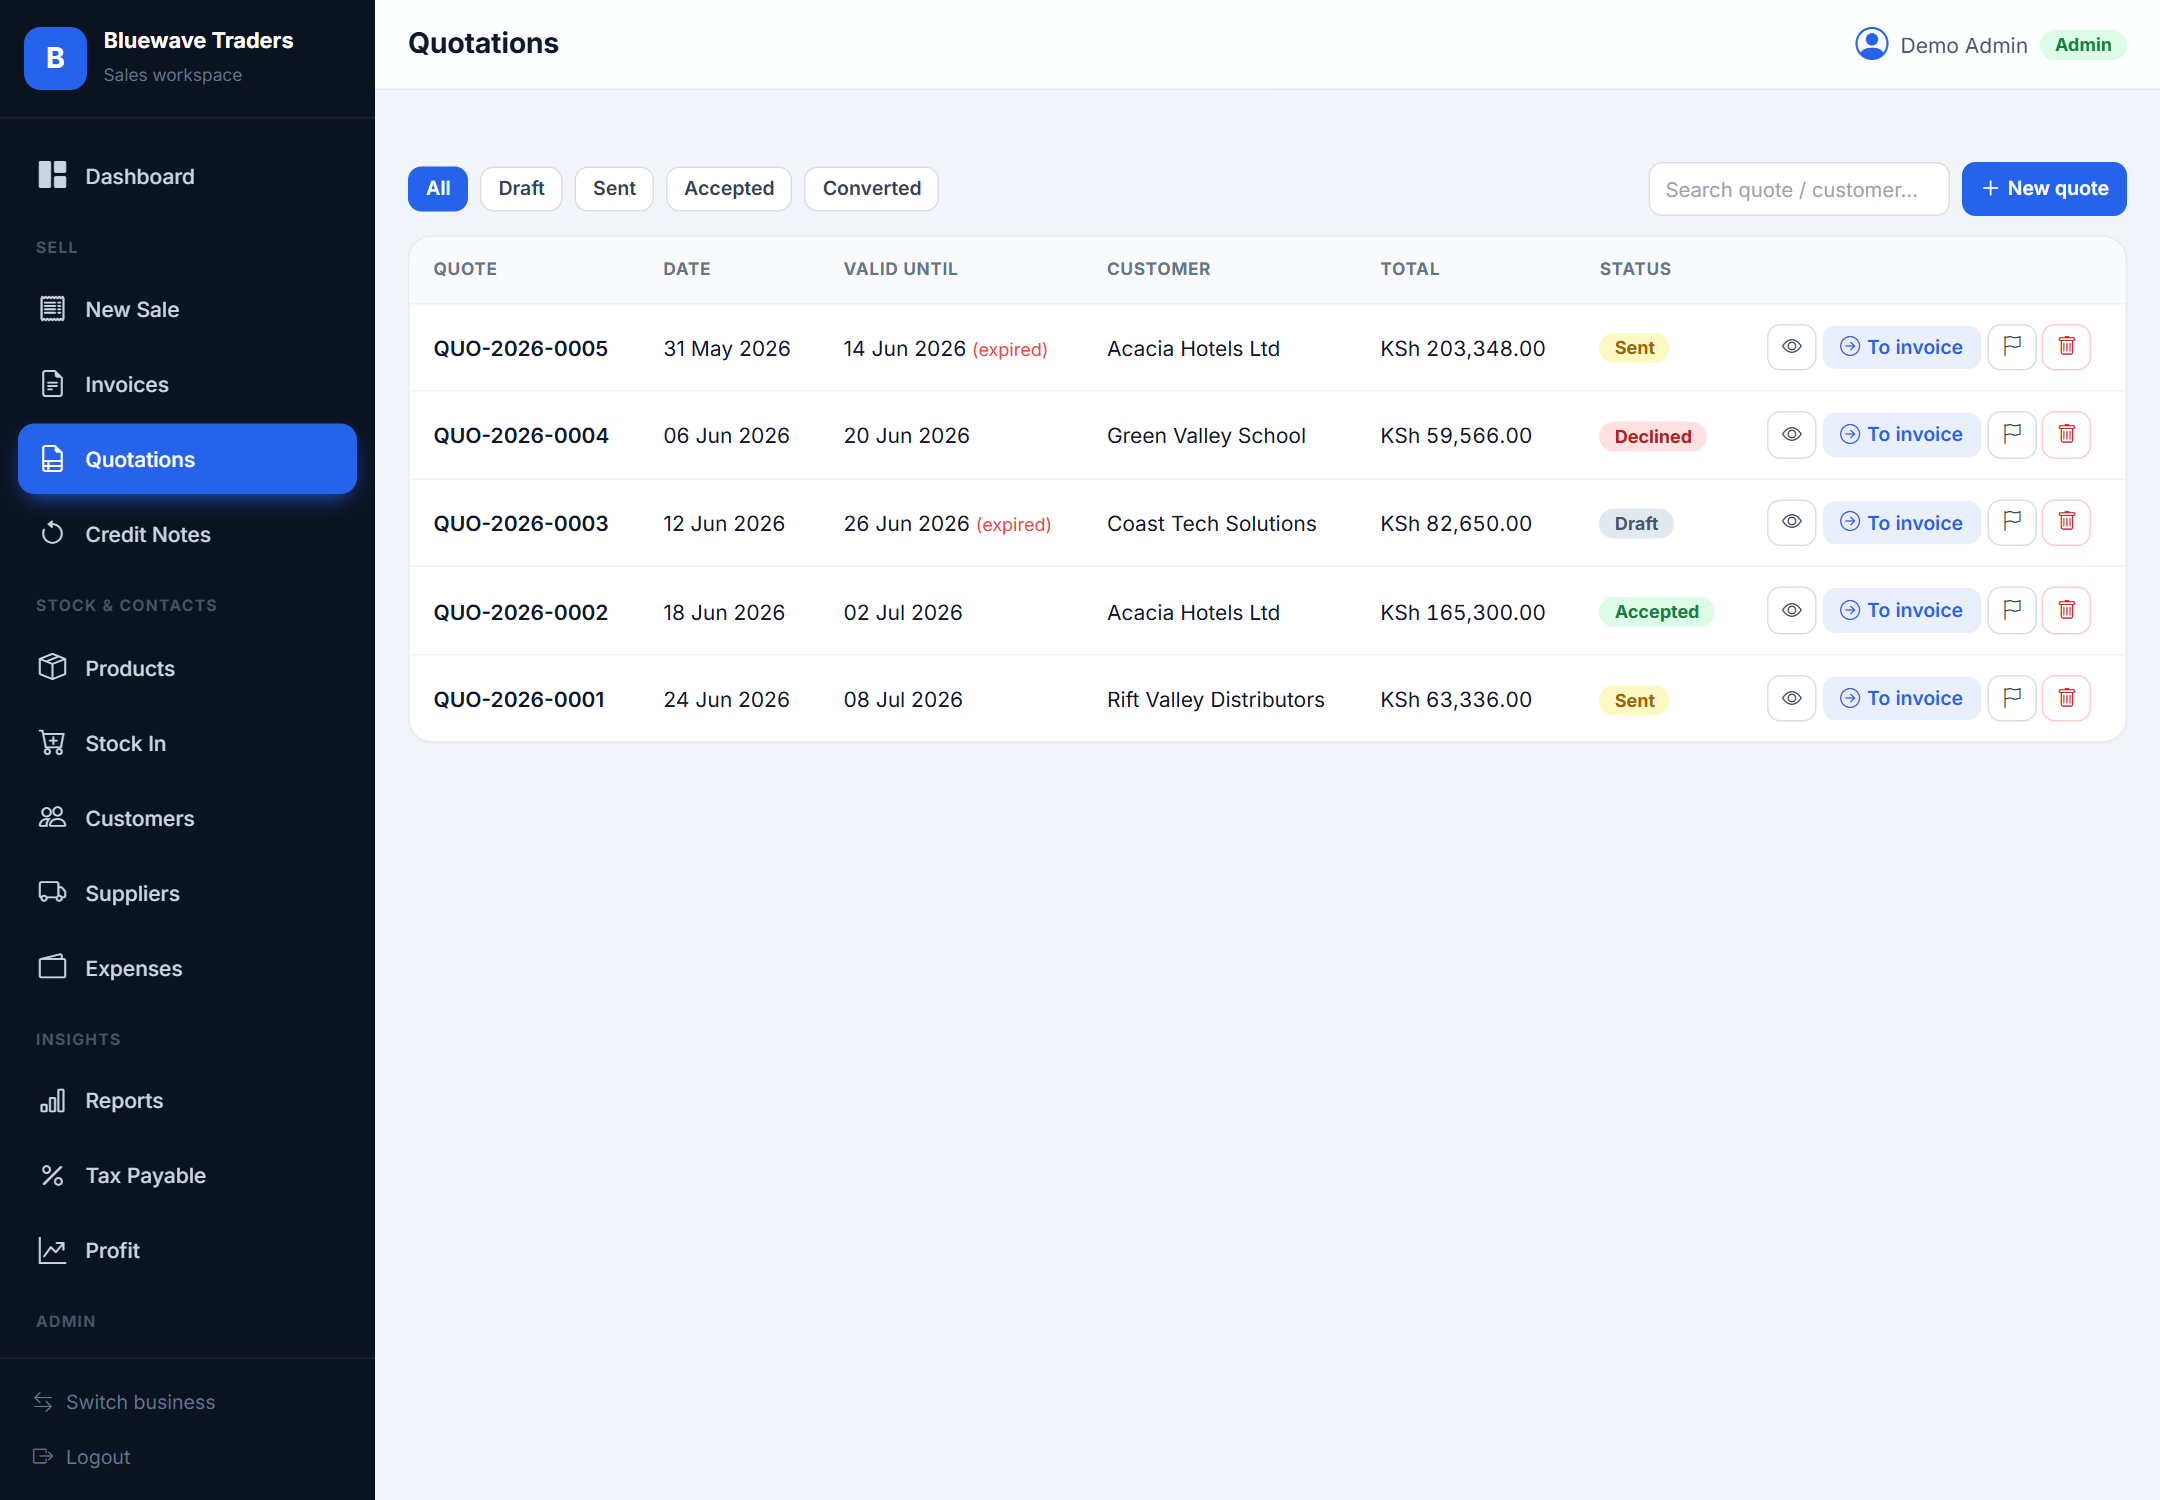
Quotations
Send professional quotes and convert the winners into invoices instantly.
Build a quotation just like a sale, set a validity date, and track its status (Draft, Sent, Accepted, Declined). When a customer accepts, convert the quote to an invoice with one click — no re-typing the items.
- Quotations keep their own QUO- numbering series.
- Converting a quote links it to the resulting invoice.
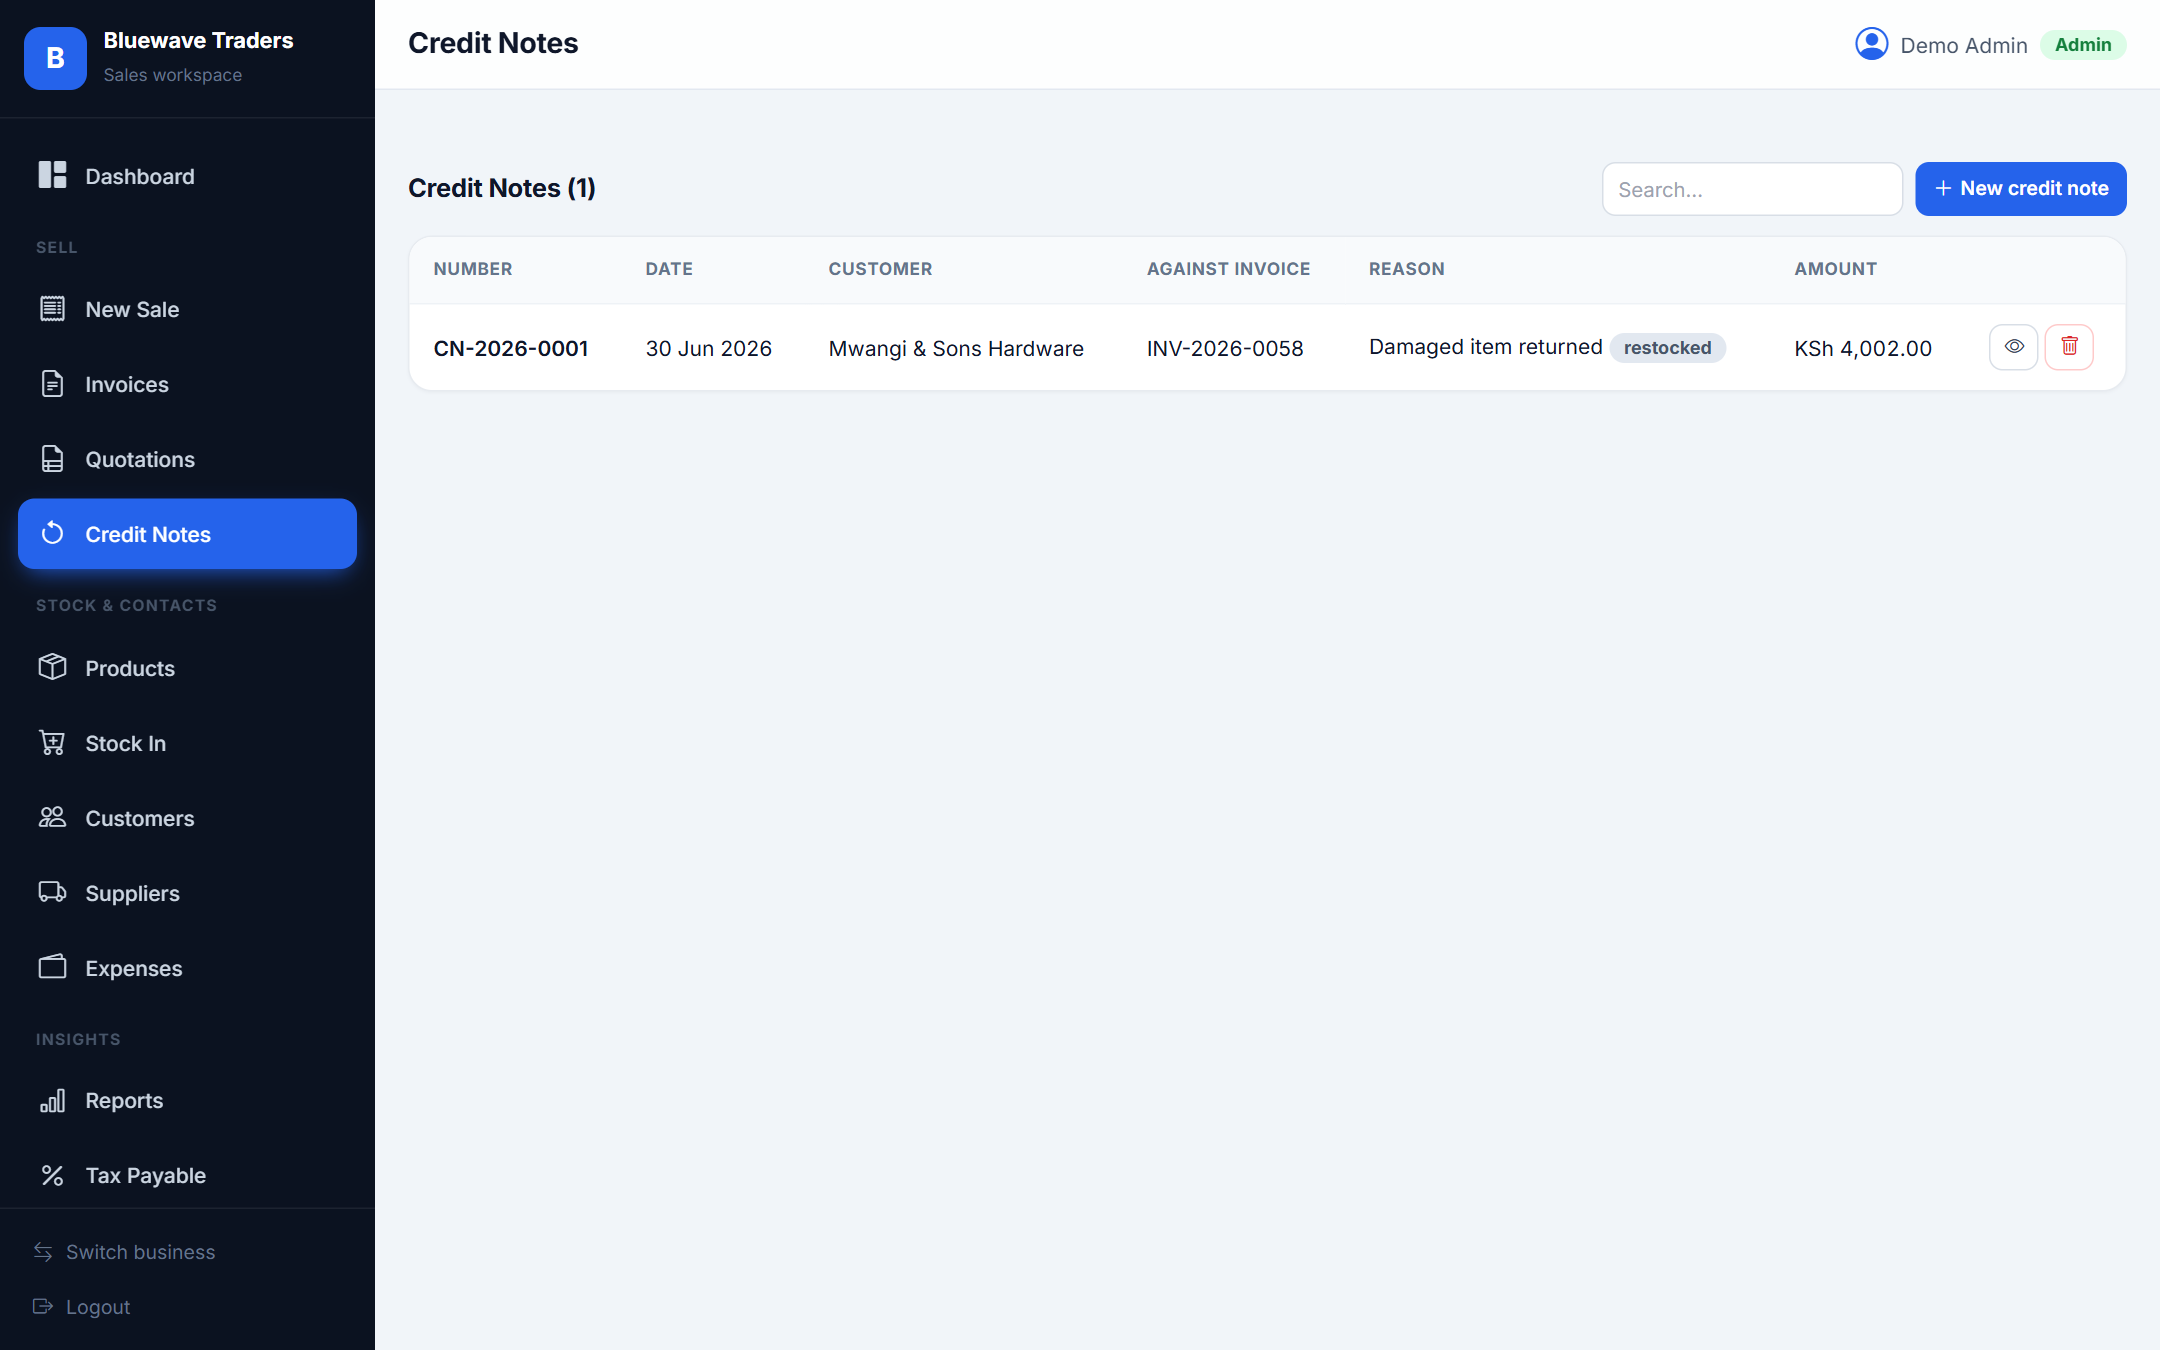
Credit notes & returns
Handle refunds and returns cleanly against the original invoice.
Raise a credit note linked to an invoice, record the reason, and choose whether returned items should go back into stock. Credit notes share the invoice numbering series so your records stay consistent and auditable.
- Tick “restock” to automatically return goods to inventory.
- Credit notes reduce your net sales in reports.
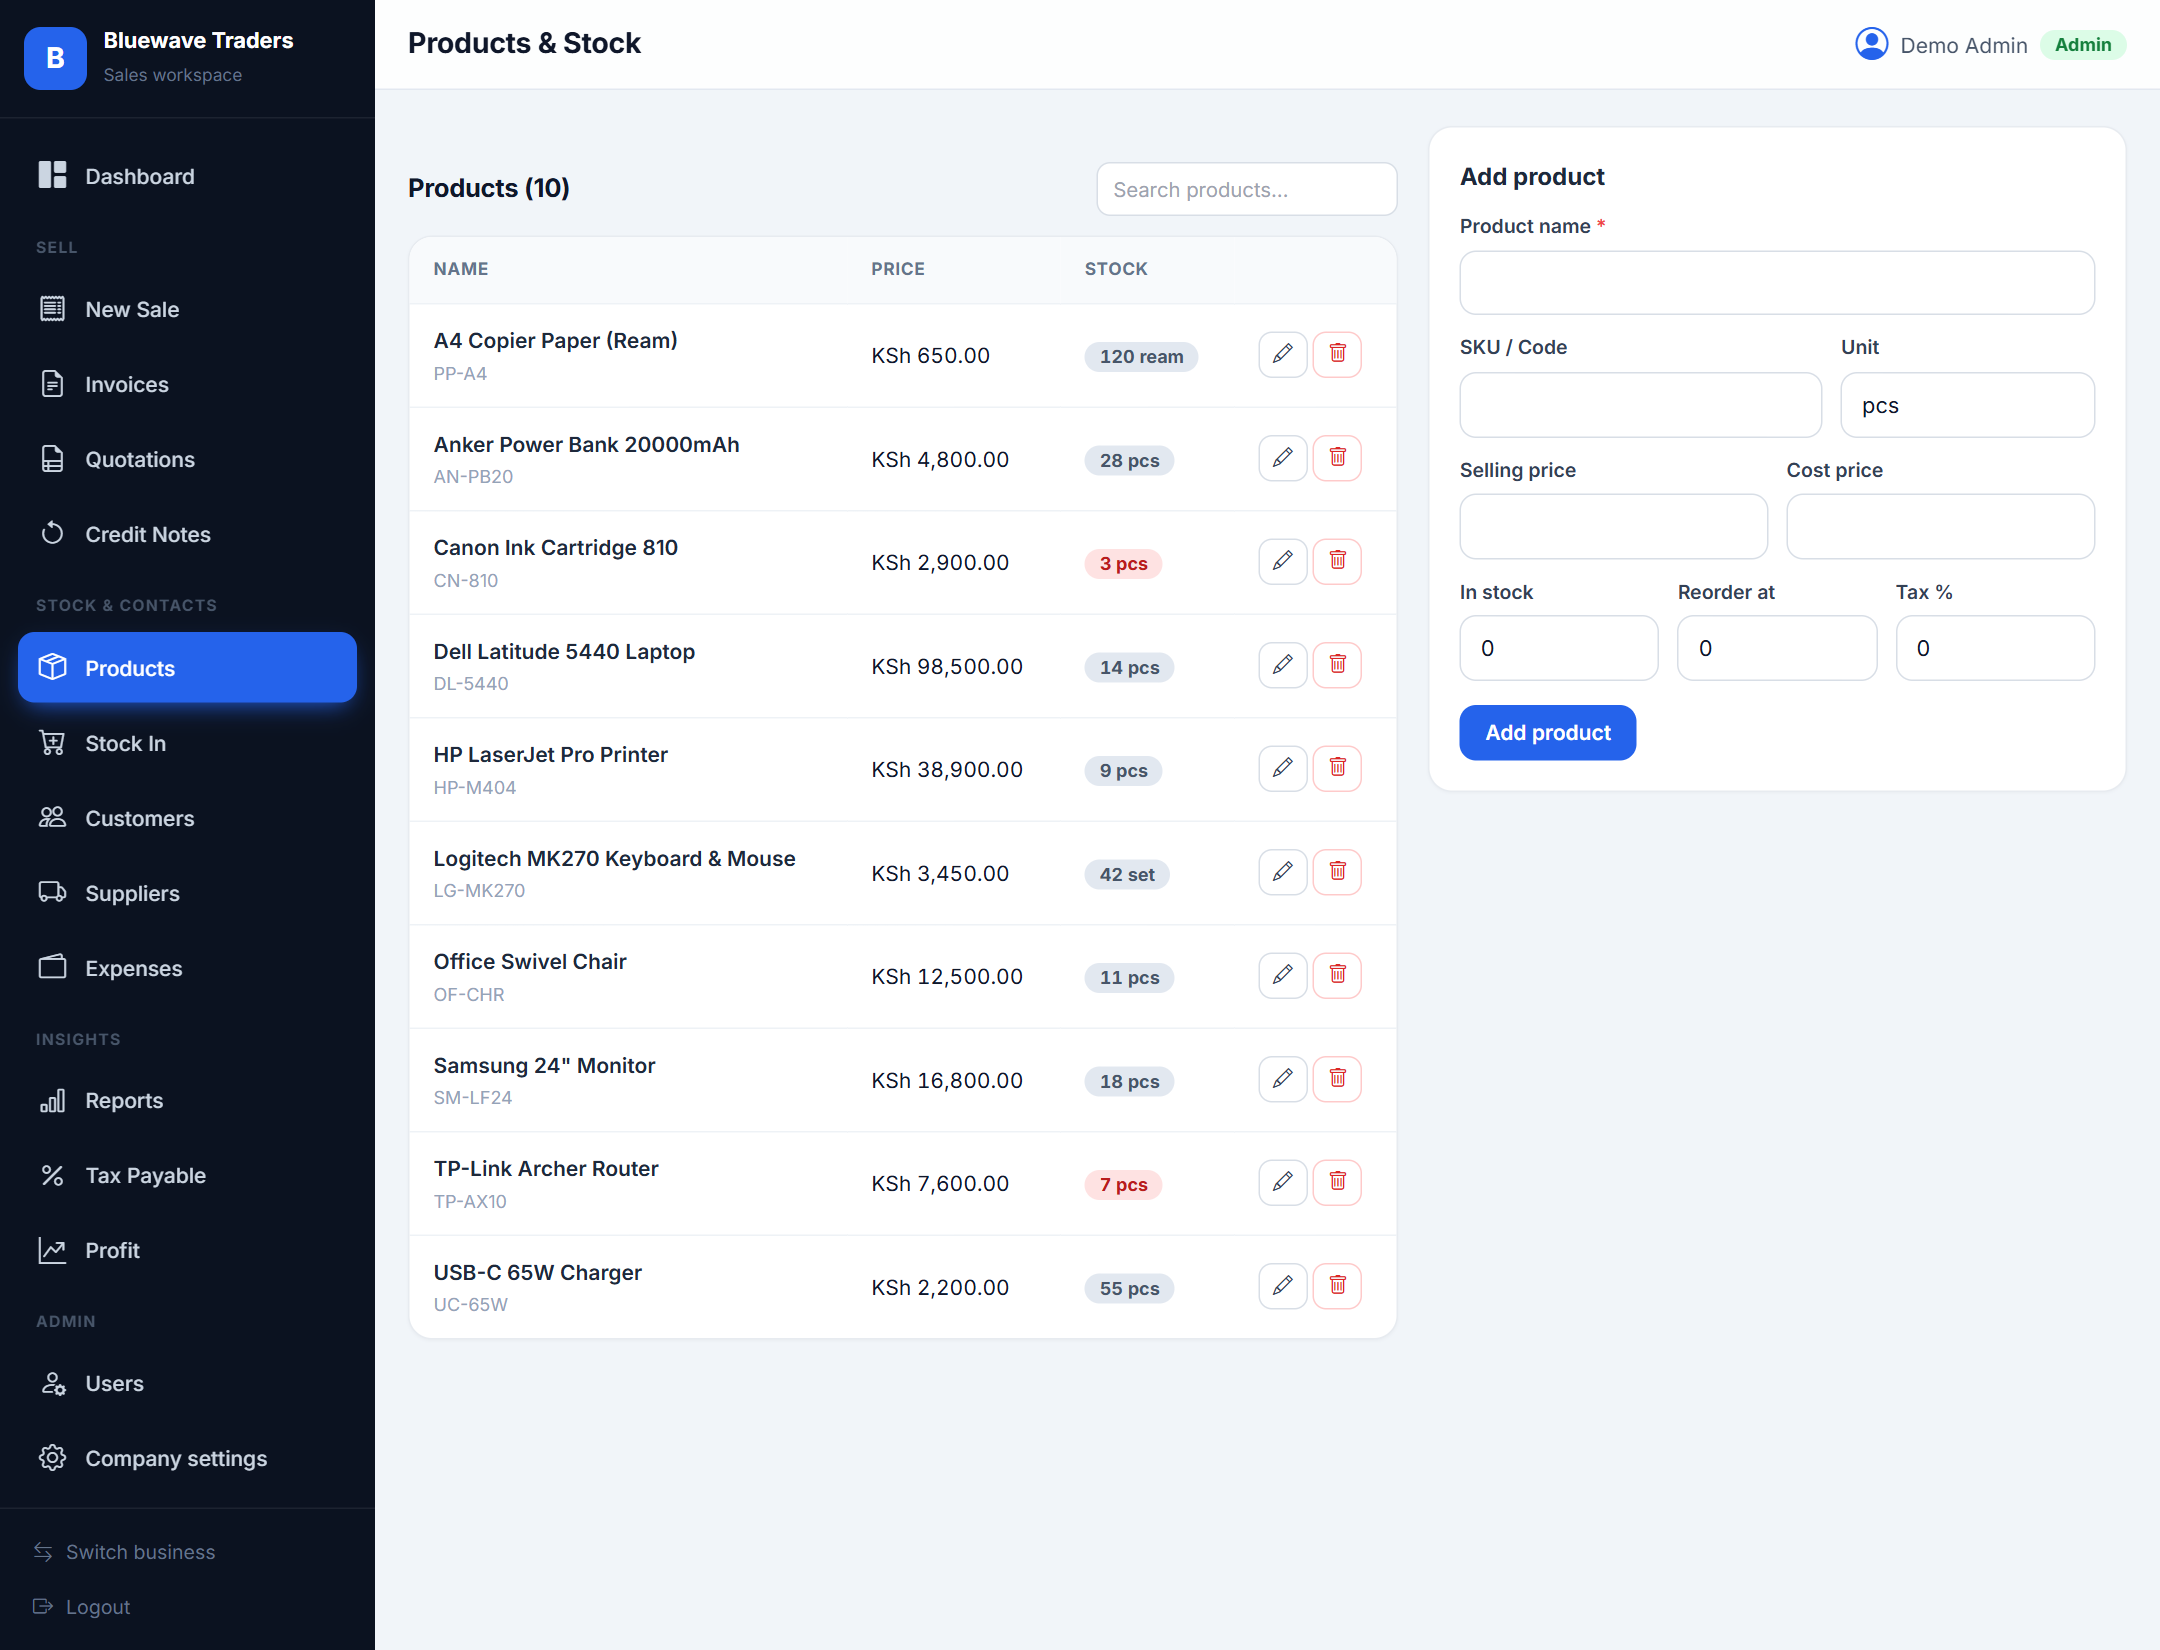
Products & stock
A live catalogue with prices, costs, stock levels and reorder points.
Add each product with its selling price, cost, unit, tax rate and reorder level. Stock goes down with every sale and up with every stock-in, so the quantity on hand is always current. Set a reorder level and the dashboard will alert you when stock runs low.
- Cost is used to calculate true profit and stock value.
- Set a reorder level to enable low-stock alerts.
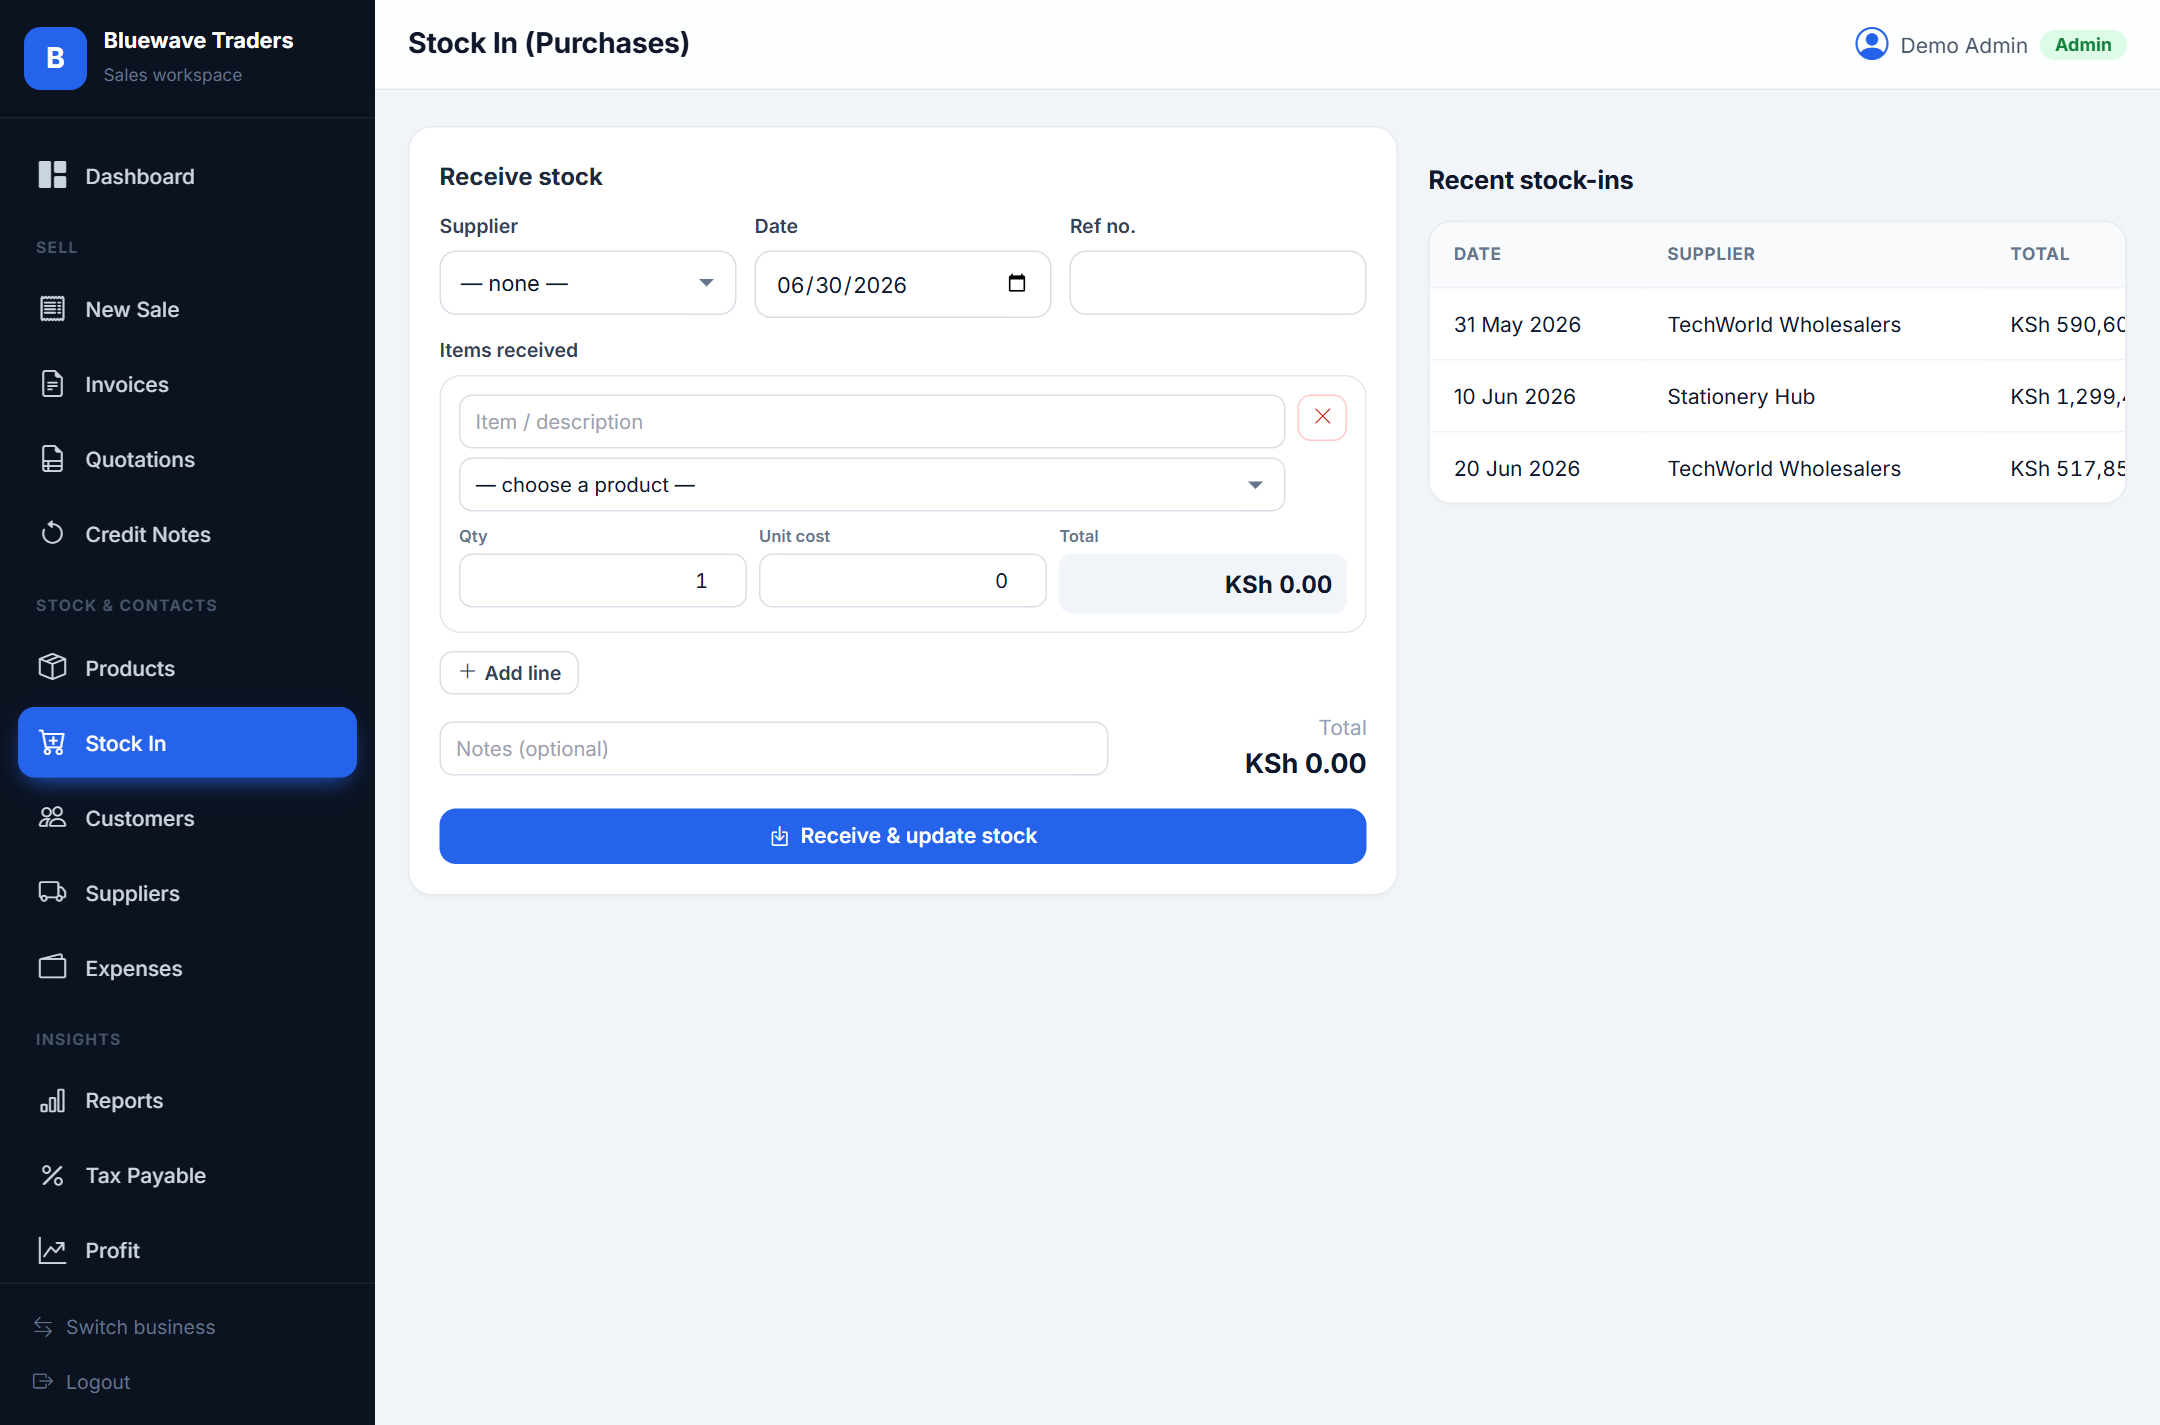
Stock-in (purchases)
Record goods received from suppliers and your inventory updates itself.
Create a stock-in entry, choose the supplier, and list the items and quantities received with their cost. Product stock increases automatically, keeping your inventory and stock valuation accurate.
- Link each purchase to a supplier for a clear paper trail.
- Costs entered here feed your profit calculations.
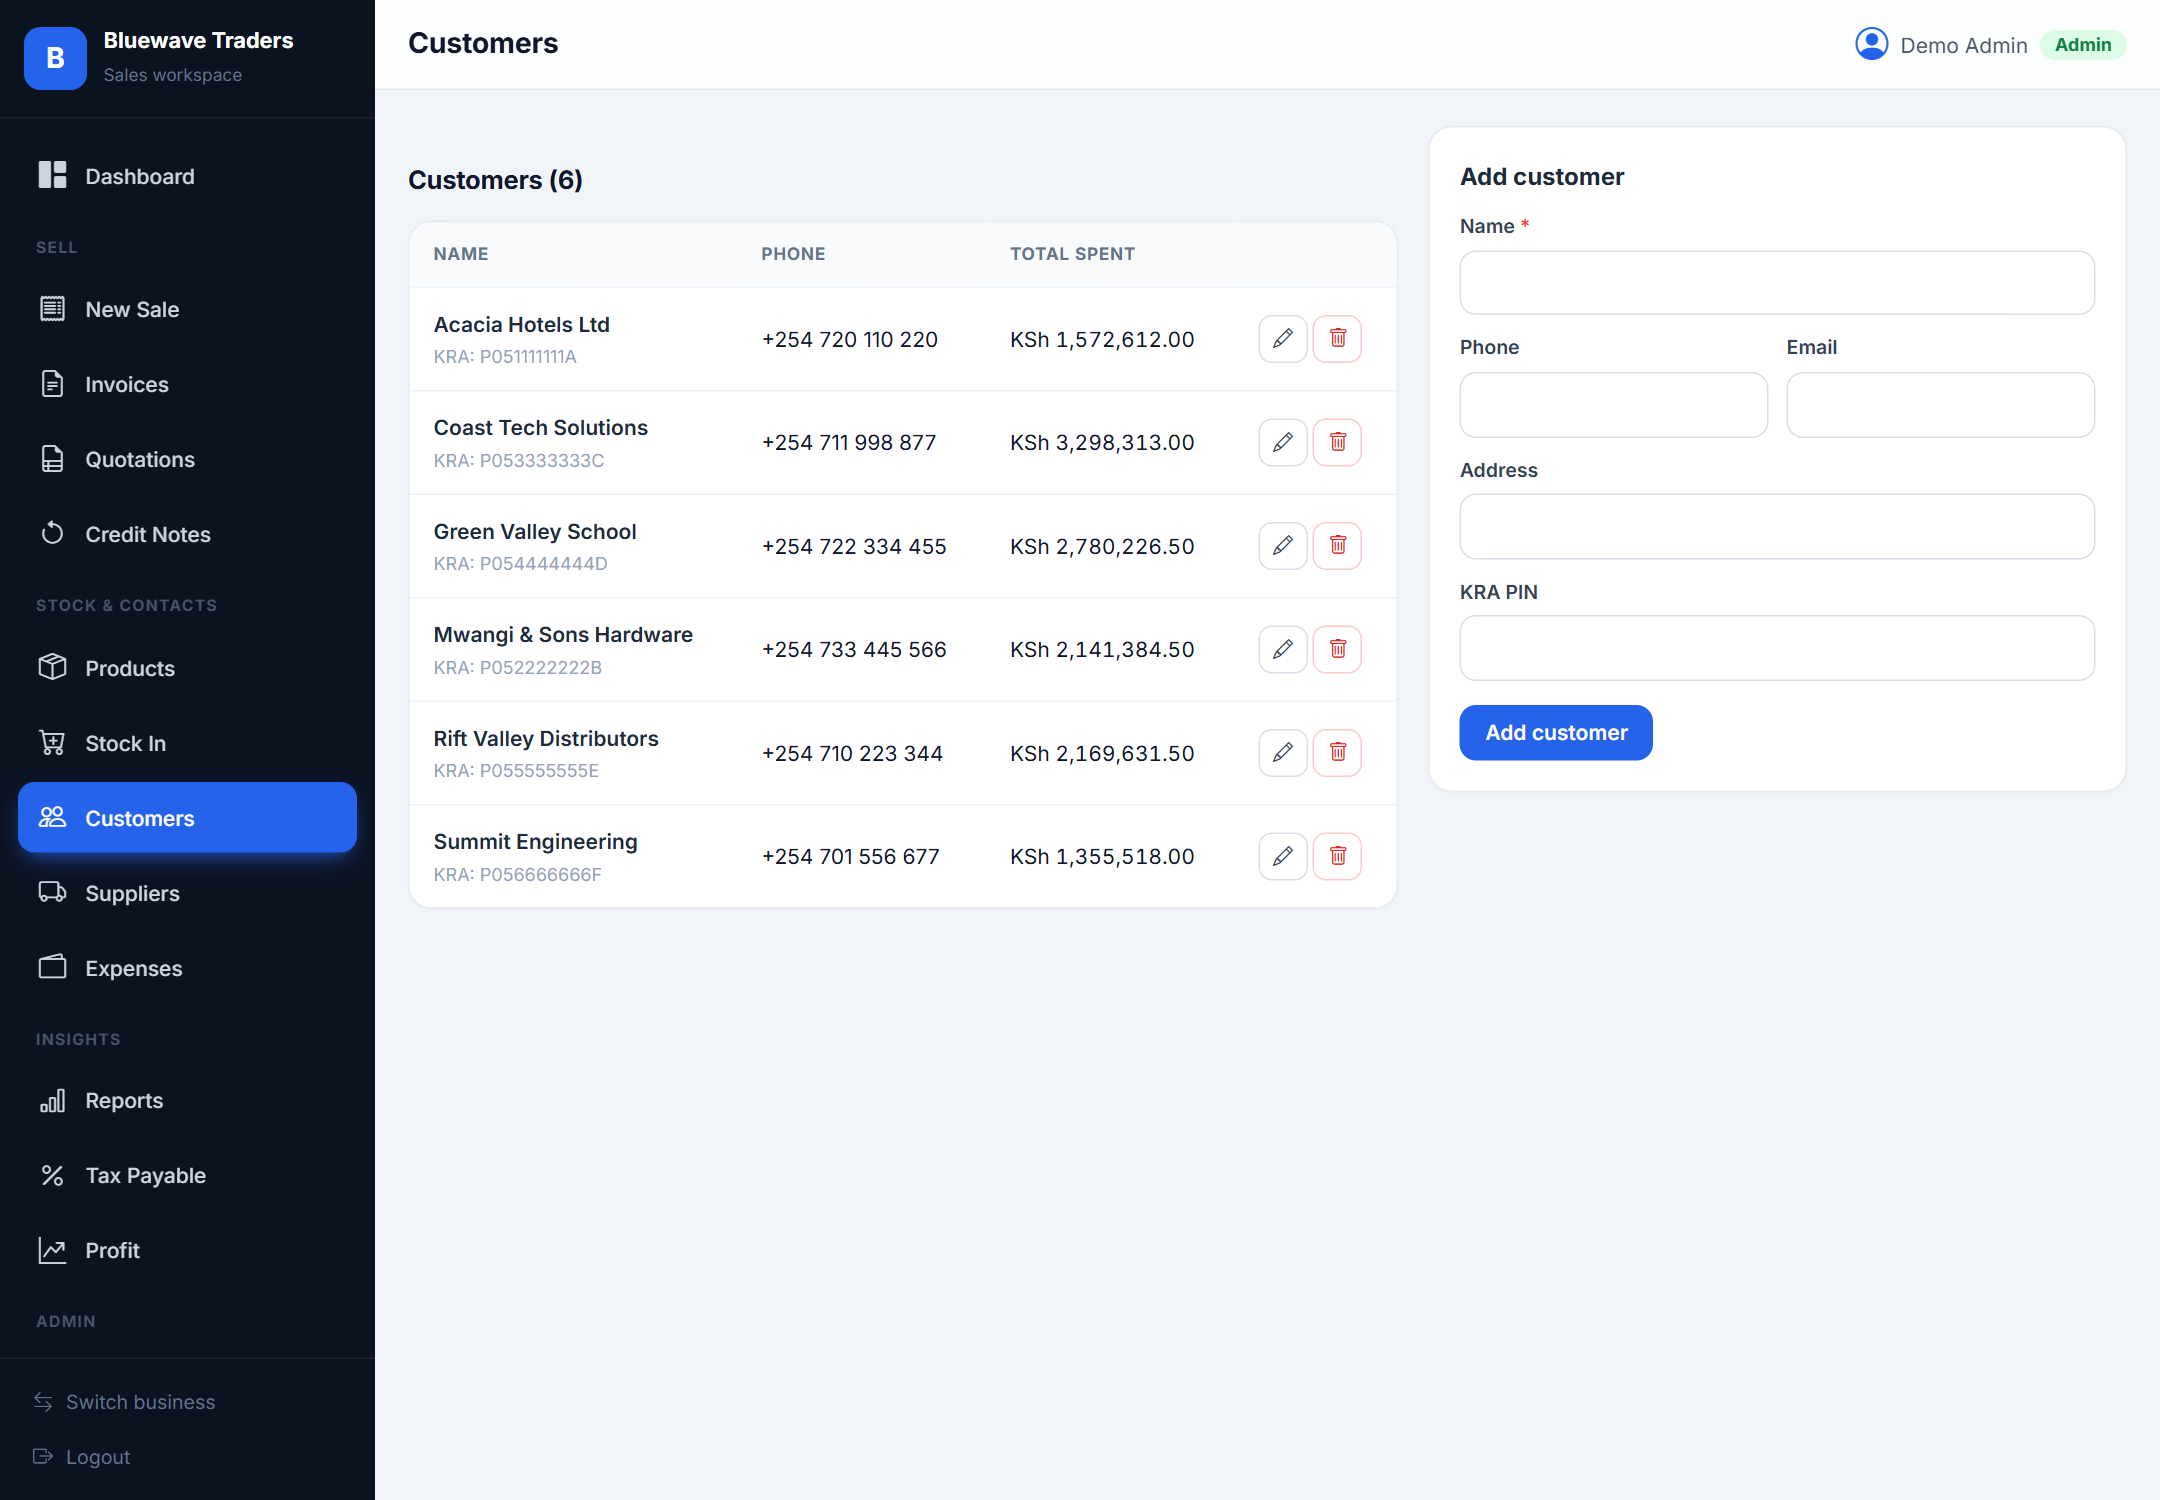
Customers
Keep a tidy address book of the people and companies you sell to.
Store each customer’s phone, email, physical address and KRA PIN. These details flow straight onto invoices and quotations, so your documents are complete and compliant.
- A saved KRA PIN appears automatically on the customer’s invoices.
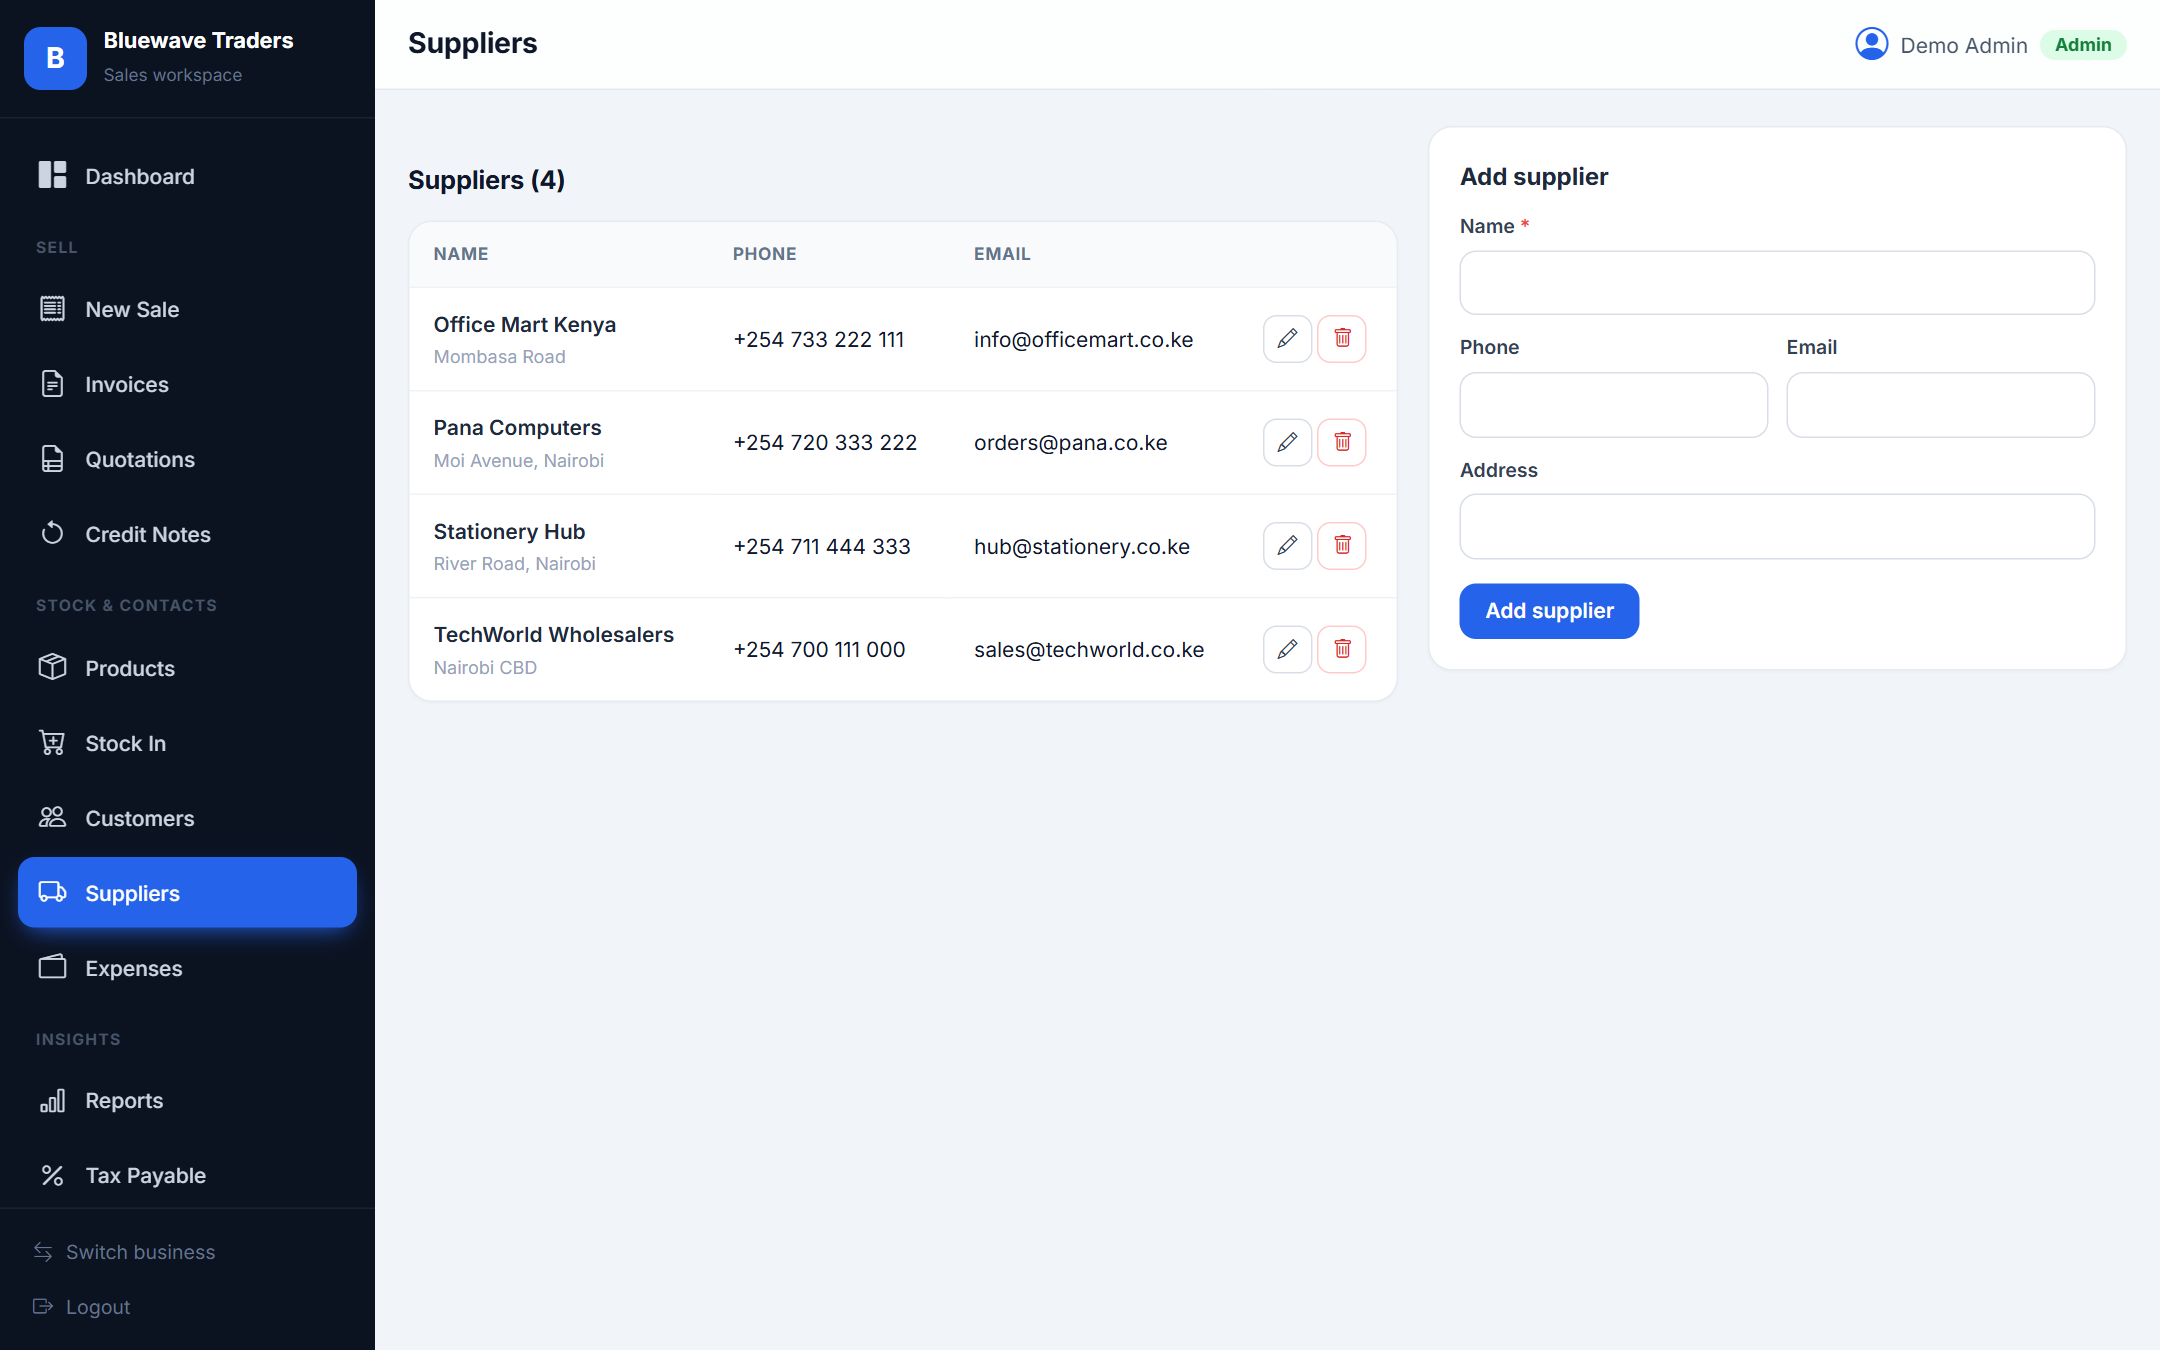
Suppliers
Track the businesses you buy stock from.
Maintain supplier contacts so every stock-in can be attributed to a source. This makes it easy to see who you buy from and to reconcile deliveries.
- Suppliers are selectable when recording stock-in.
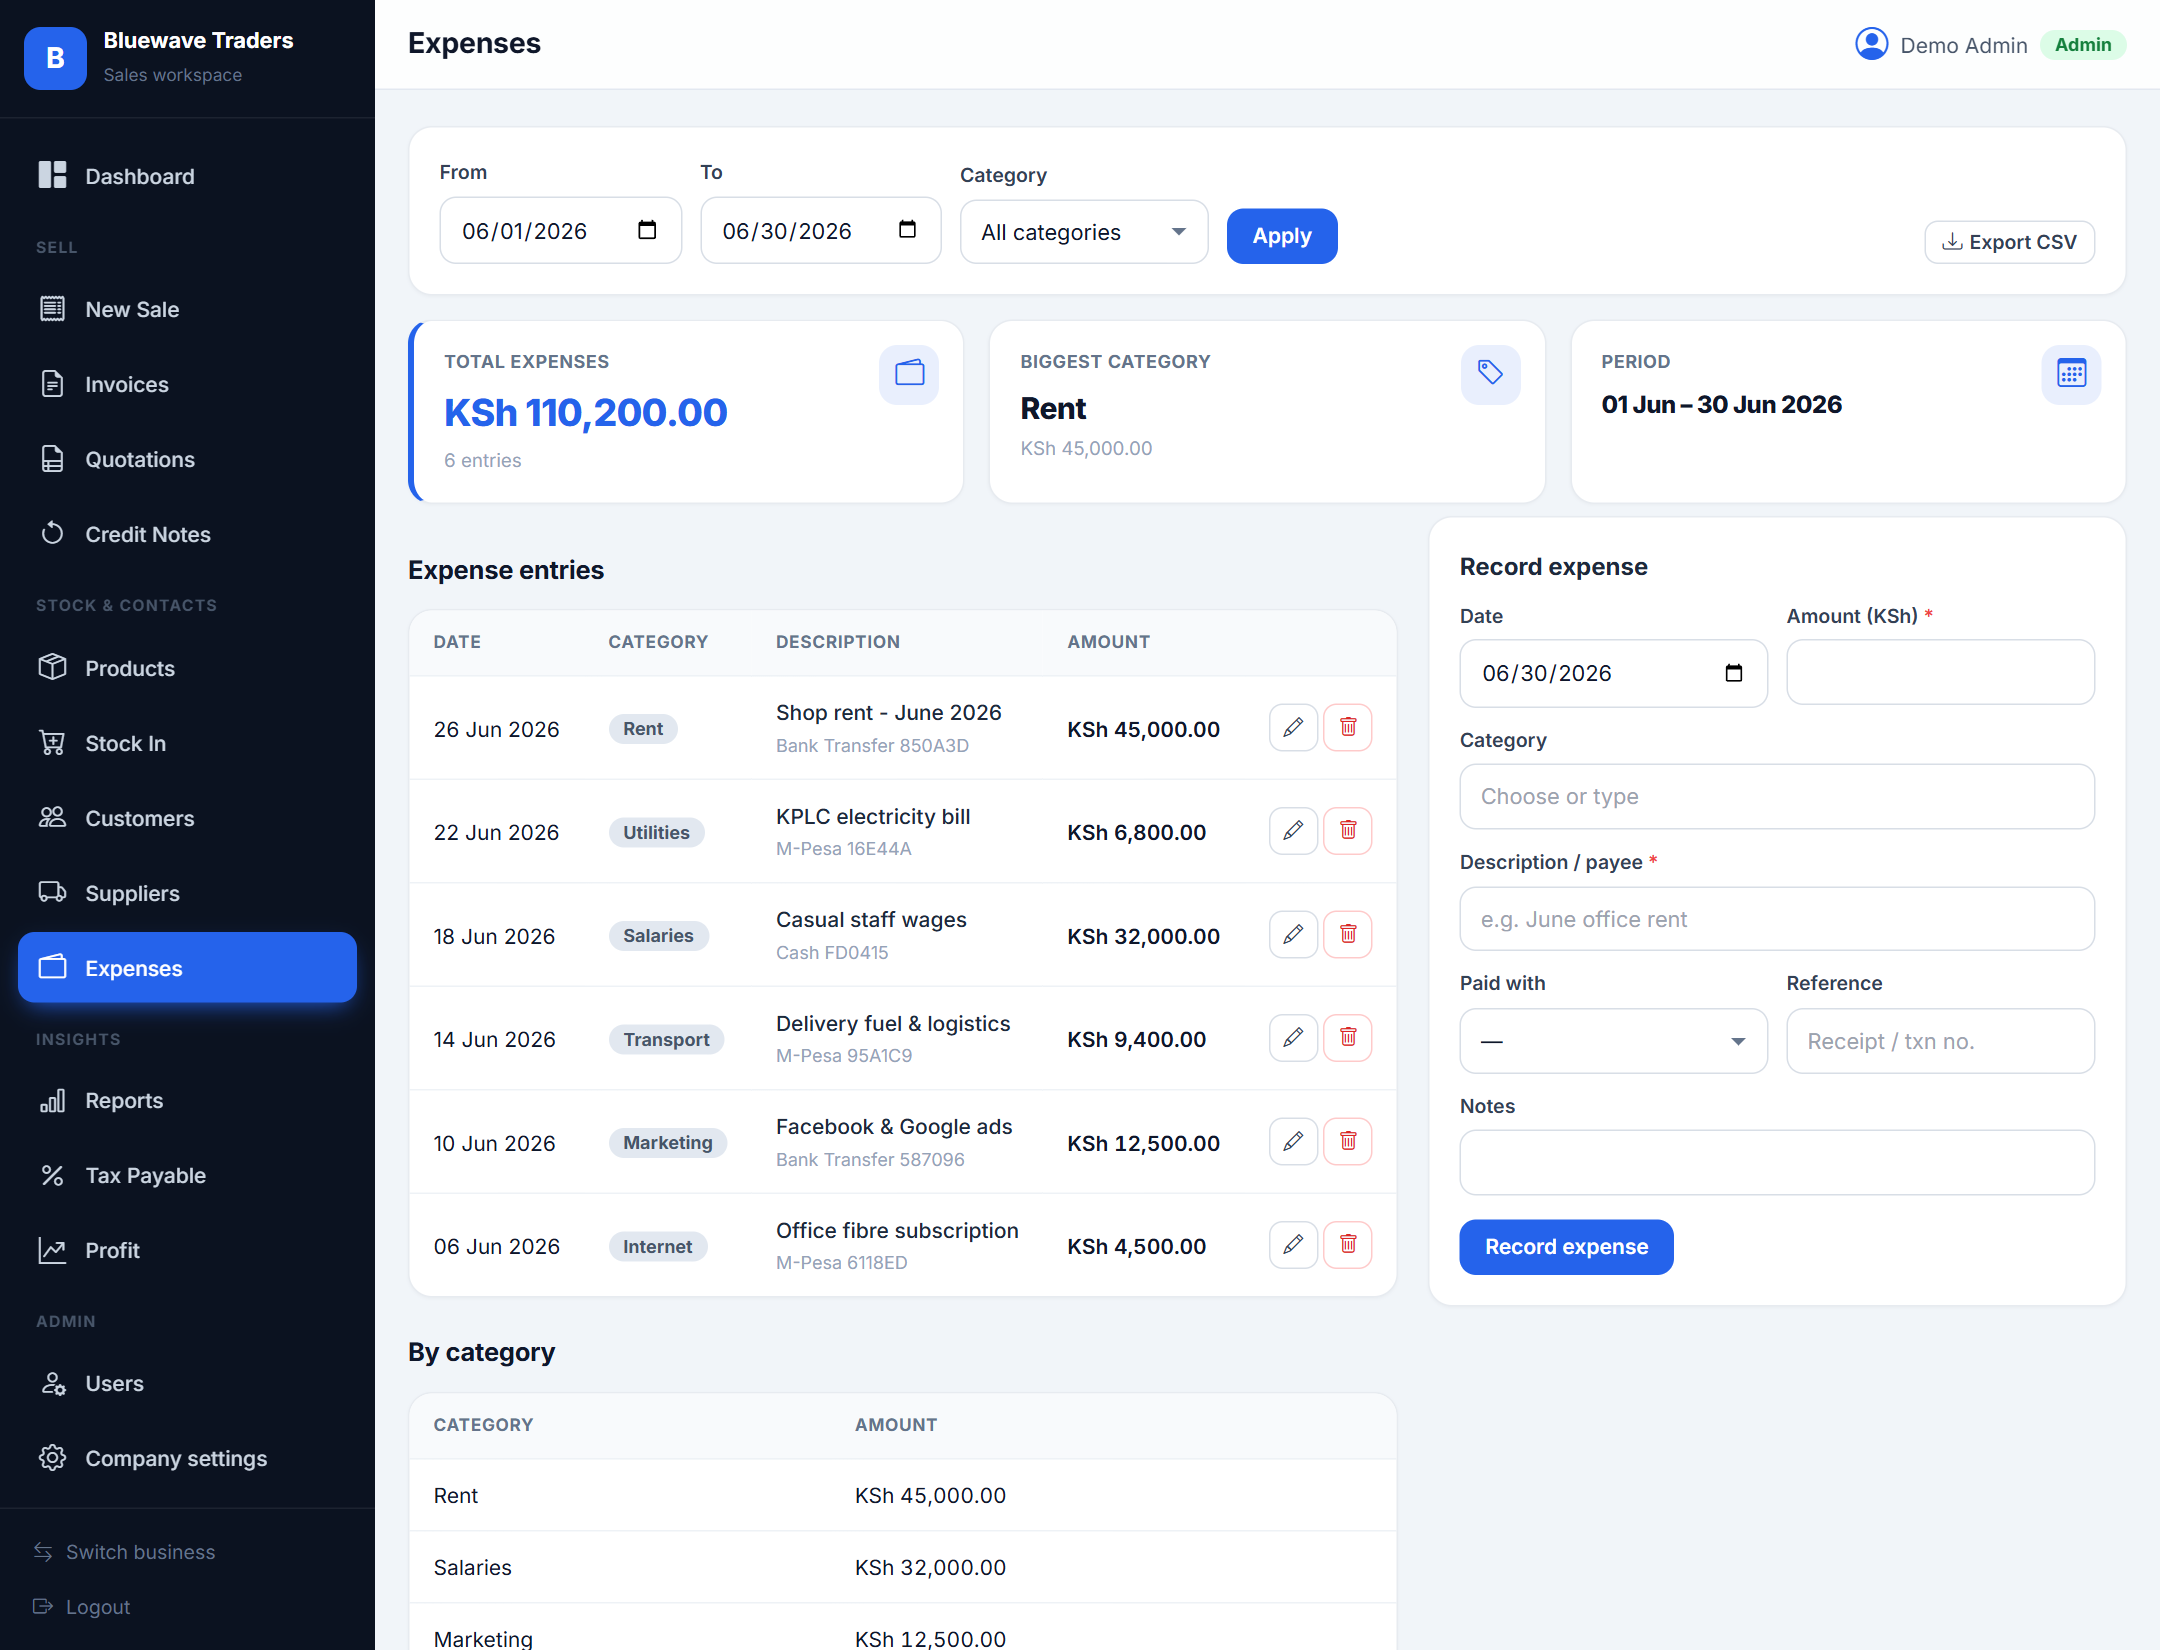
Expenses
Log overheads so your profit figures reflect the real cost of doing business.
Record running costs like rent, salaries, transport, utilities and marketing, with a category, amount and payment method. Expenses are subtracted from gross profit to give your true net profit on the dashboard and in reports.
- Categorise expenses to see where the money goes.
- Expenses are admin-relevant and feed net-profit figures.
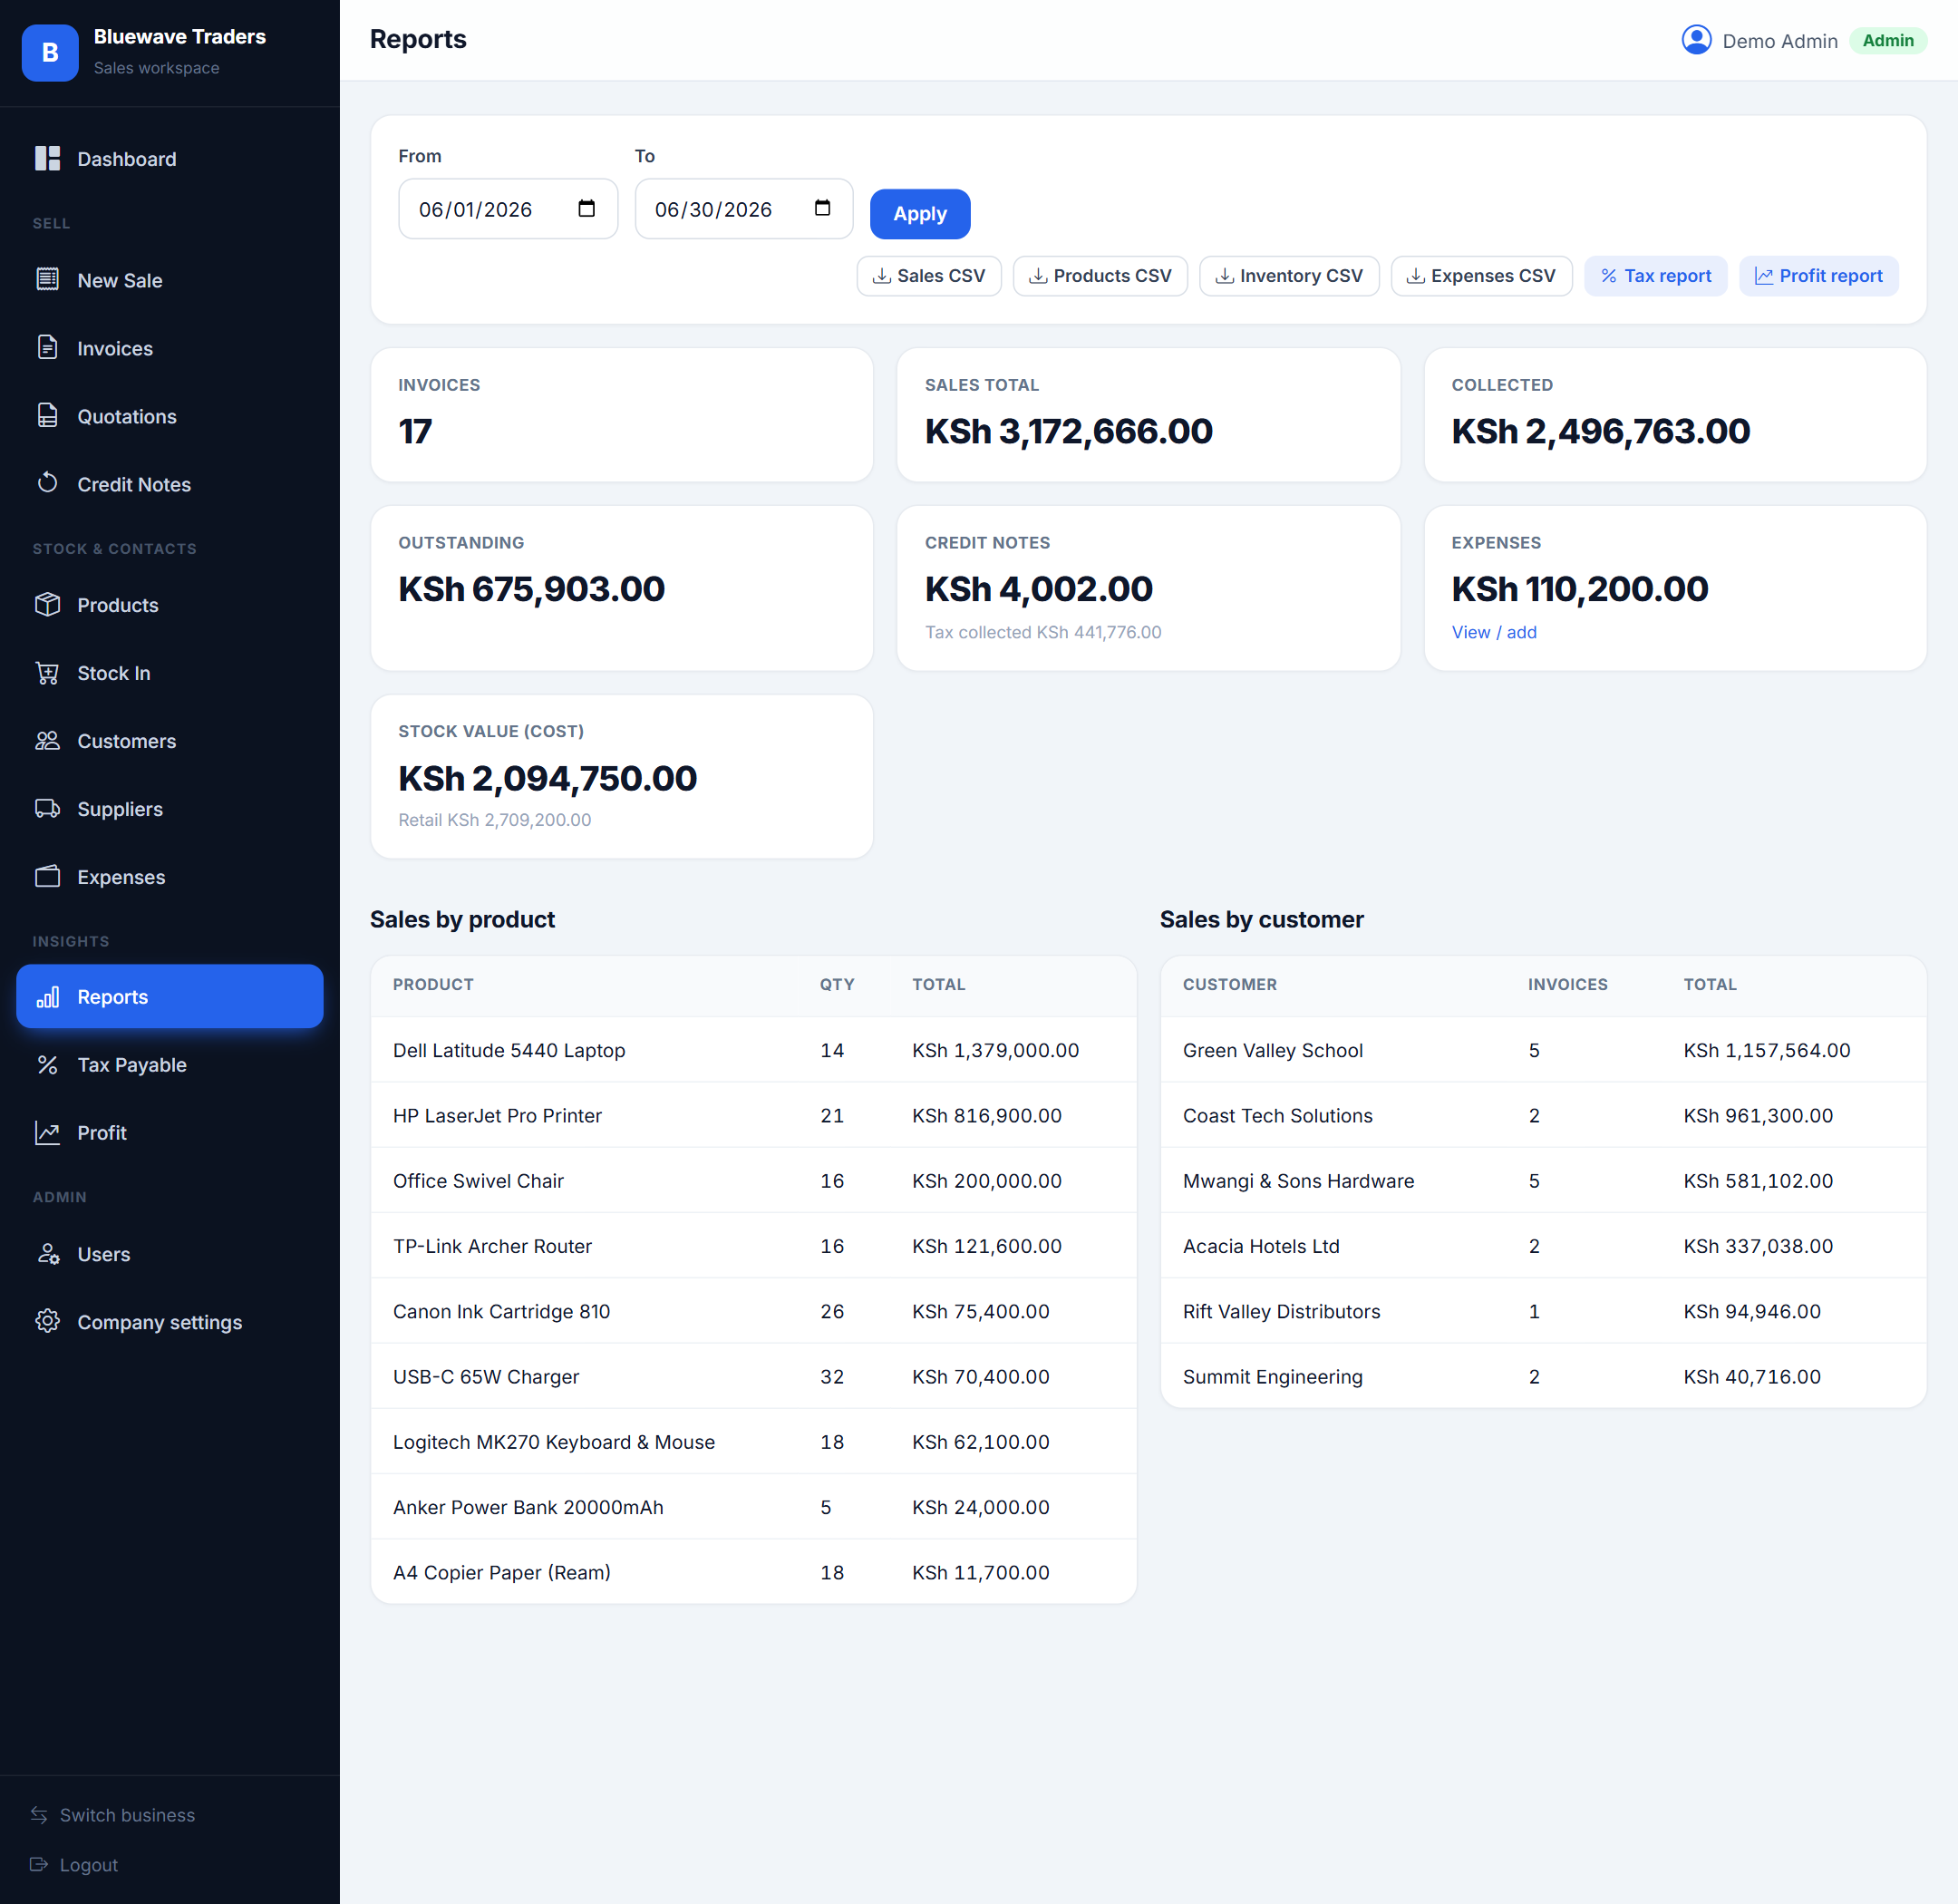
Reports
Understand your business with breakdowns and one-click CSV exports.
Filter by date range to see invoices, sales totals, money collected, outstanding balances, credit notes and stock value. Drill into sales by product and sales by customer, then export Sales, Products, Inventory or Expenses to CSV for your accountant.
- Every export respects the date range you choose.
- Stock value is shown at both cost and retail.
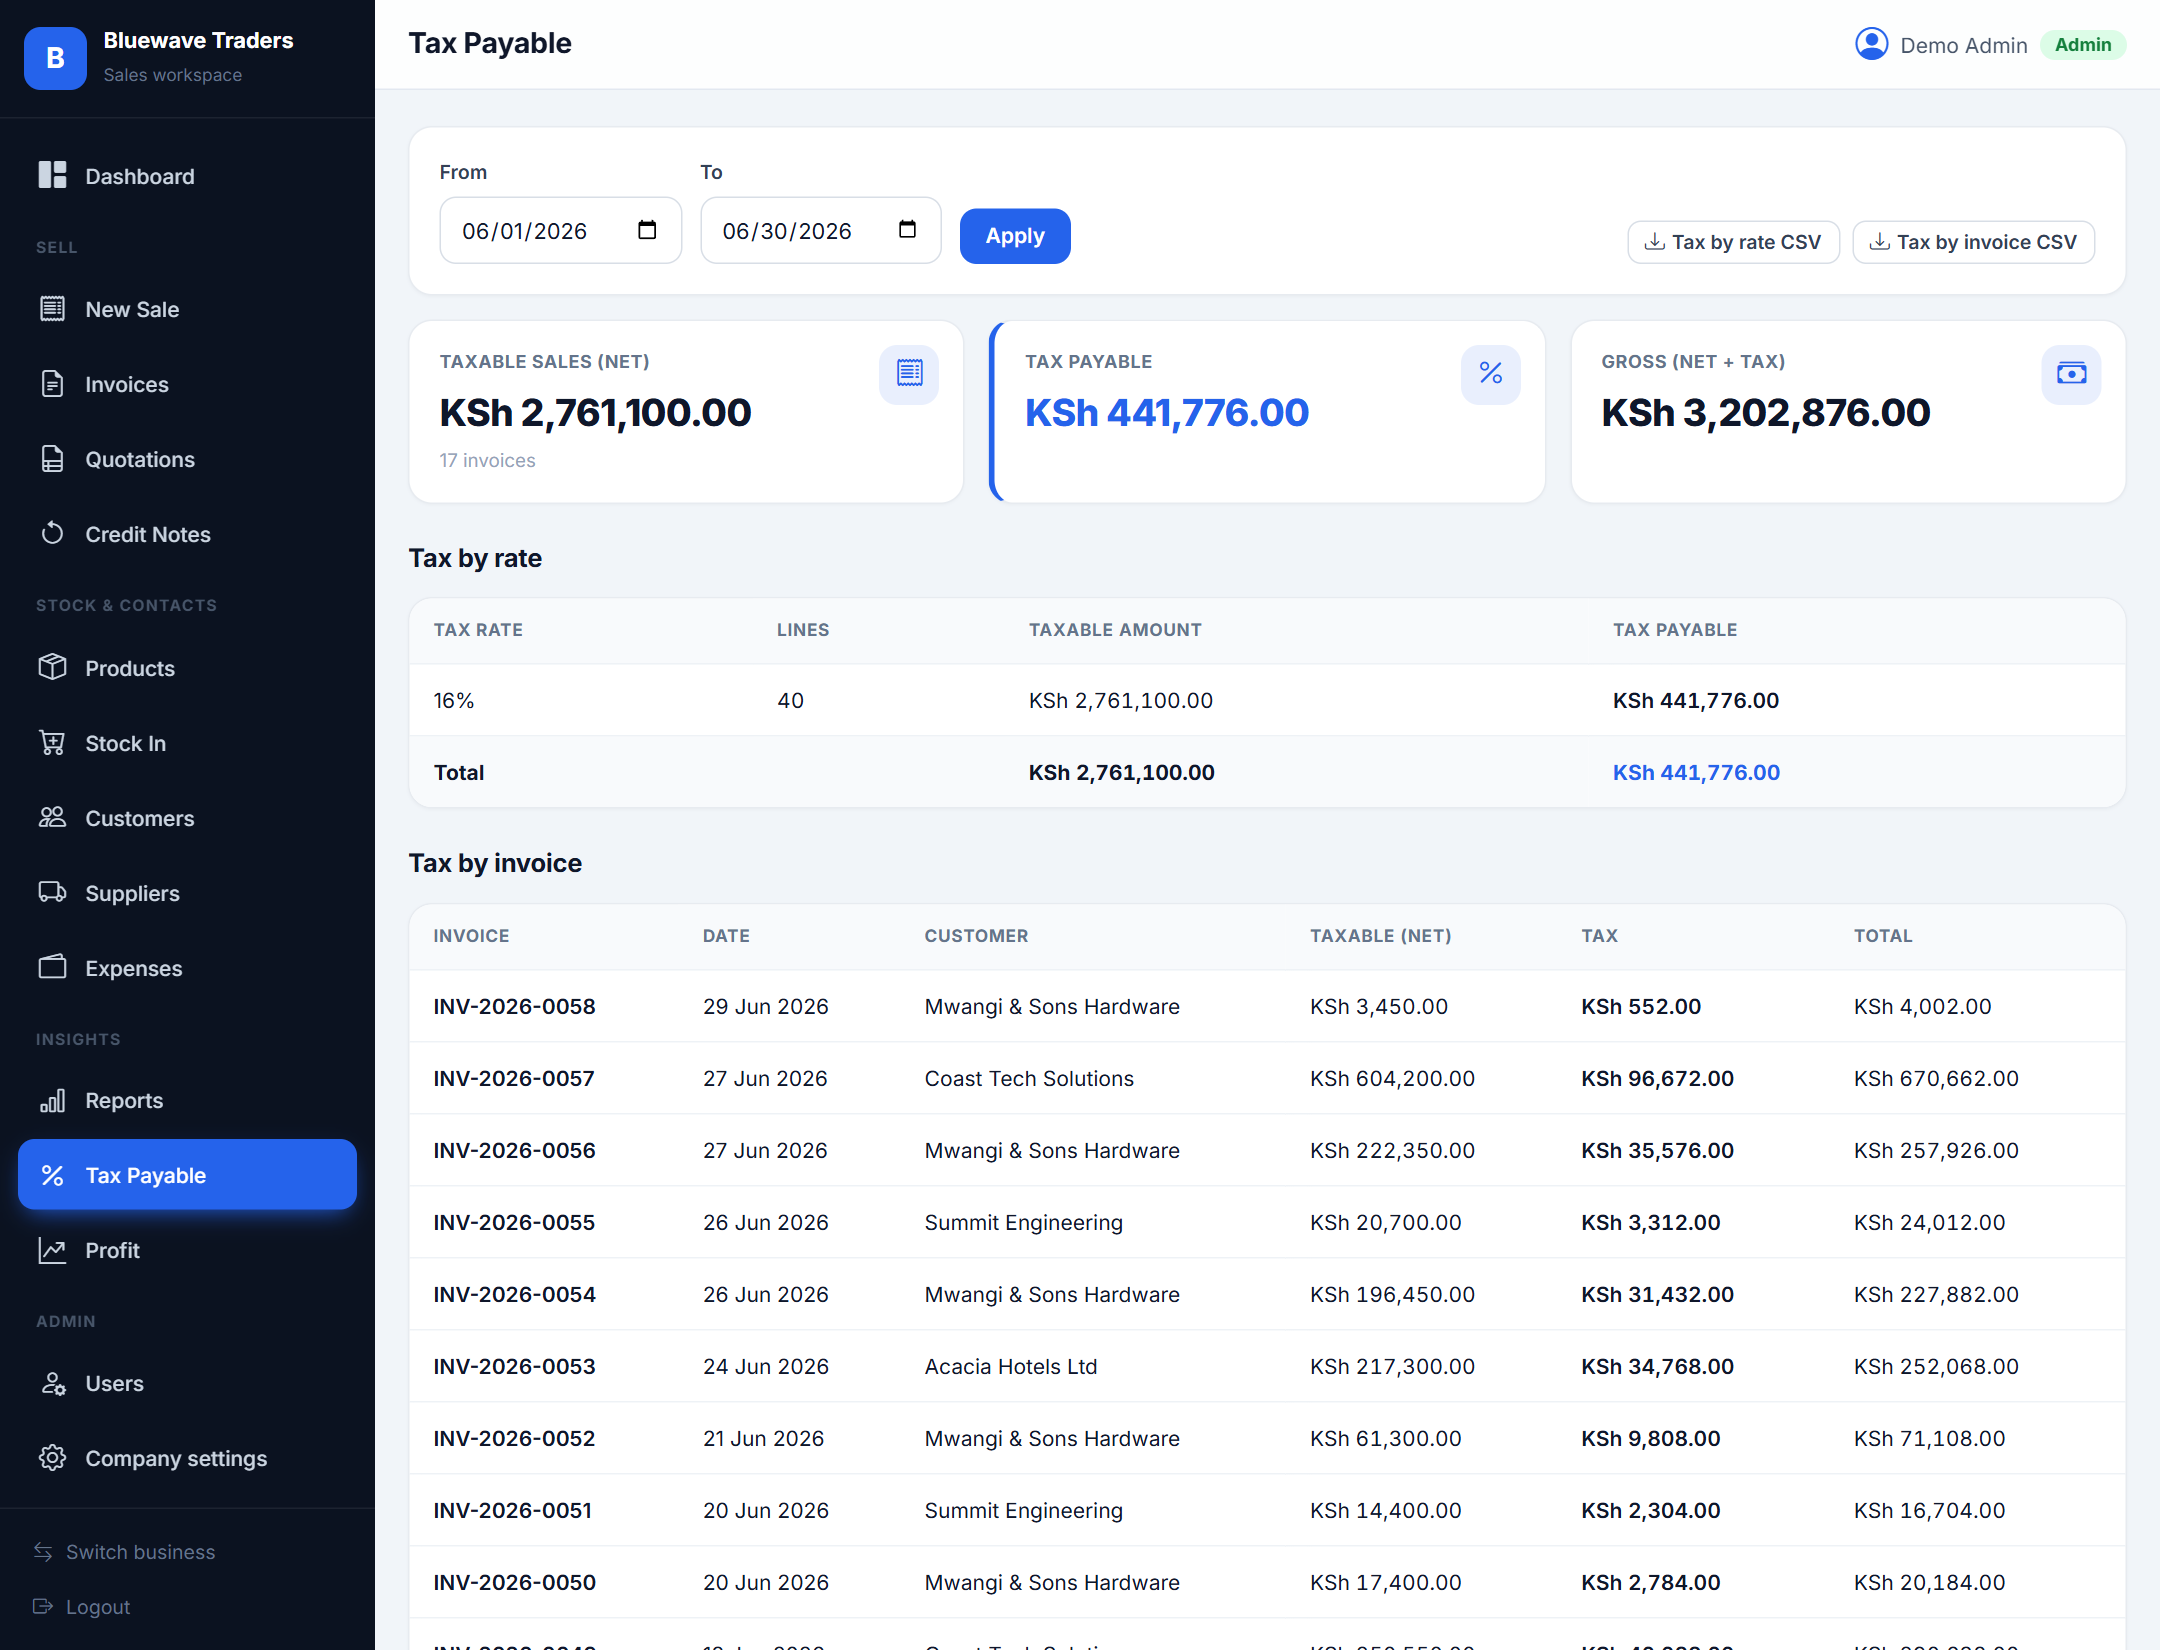
Tax payable
See the VAT you have collected, ready for filing.
The Tax Payable report summarises tax charged on your sales over a chosen period, net of credit notes, so you always know what is owed.
- Set the correct tax rate on each product for accurate totals.
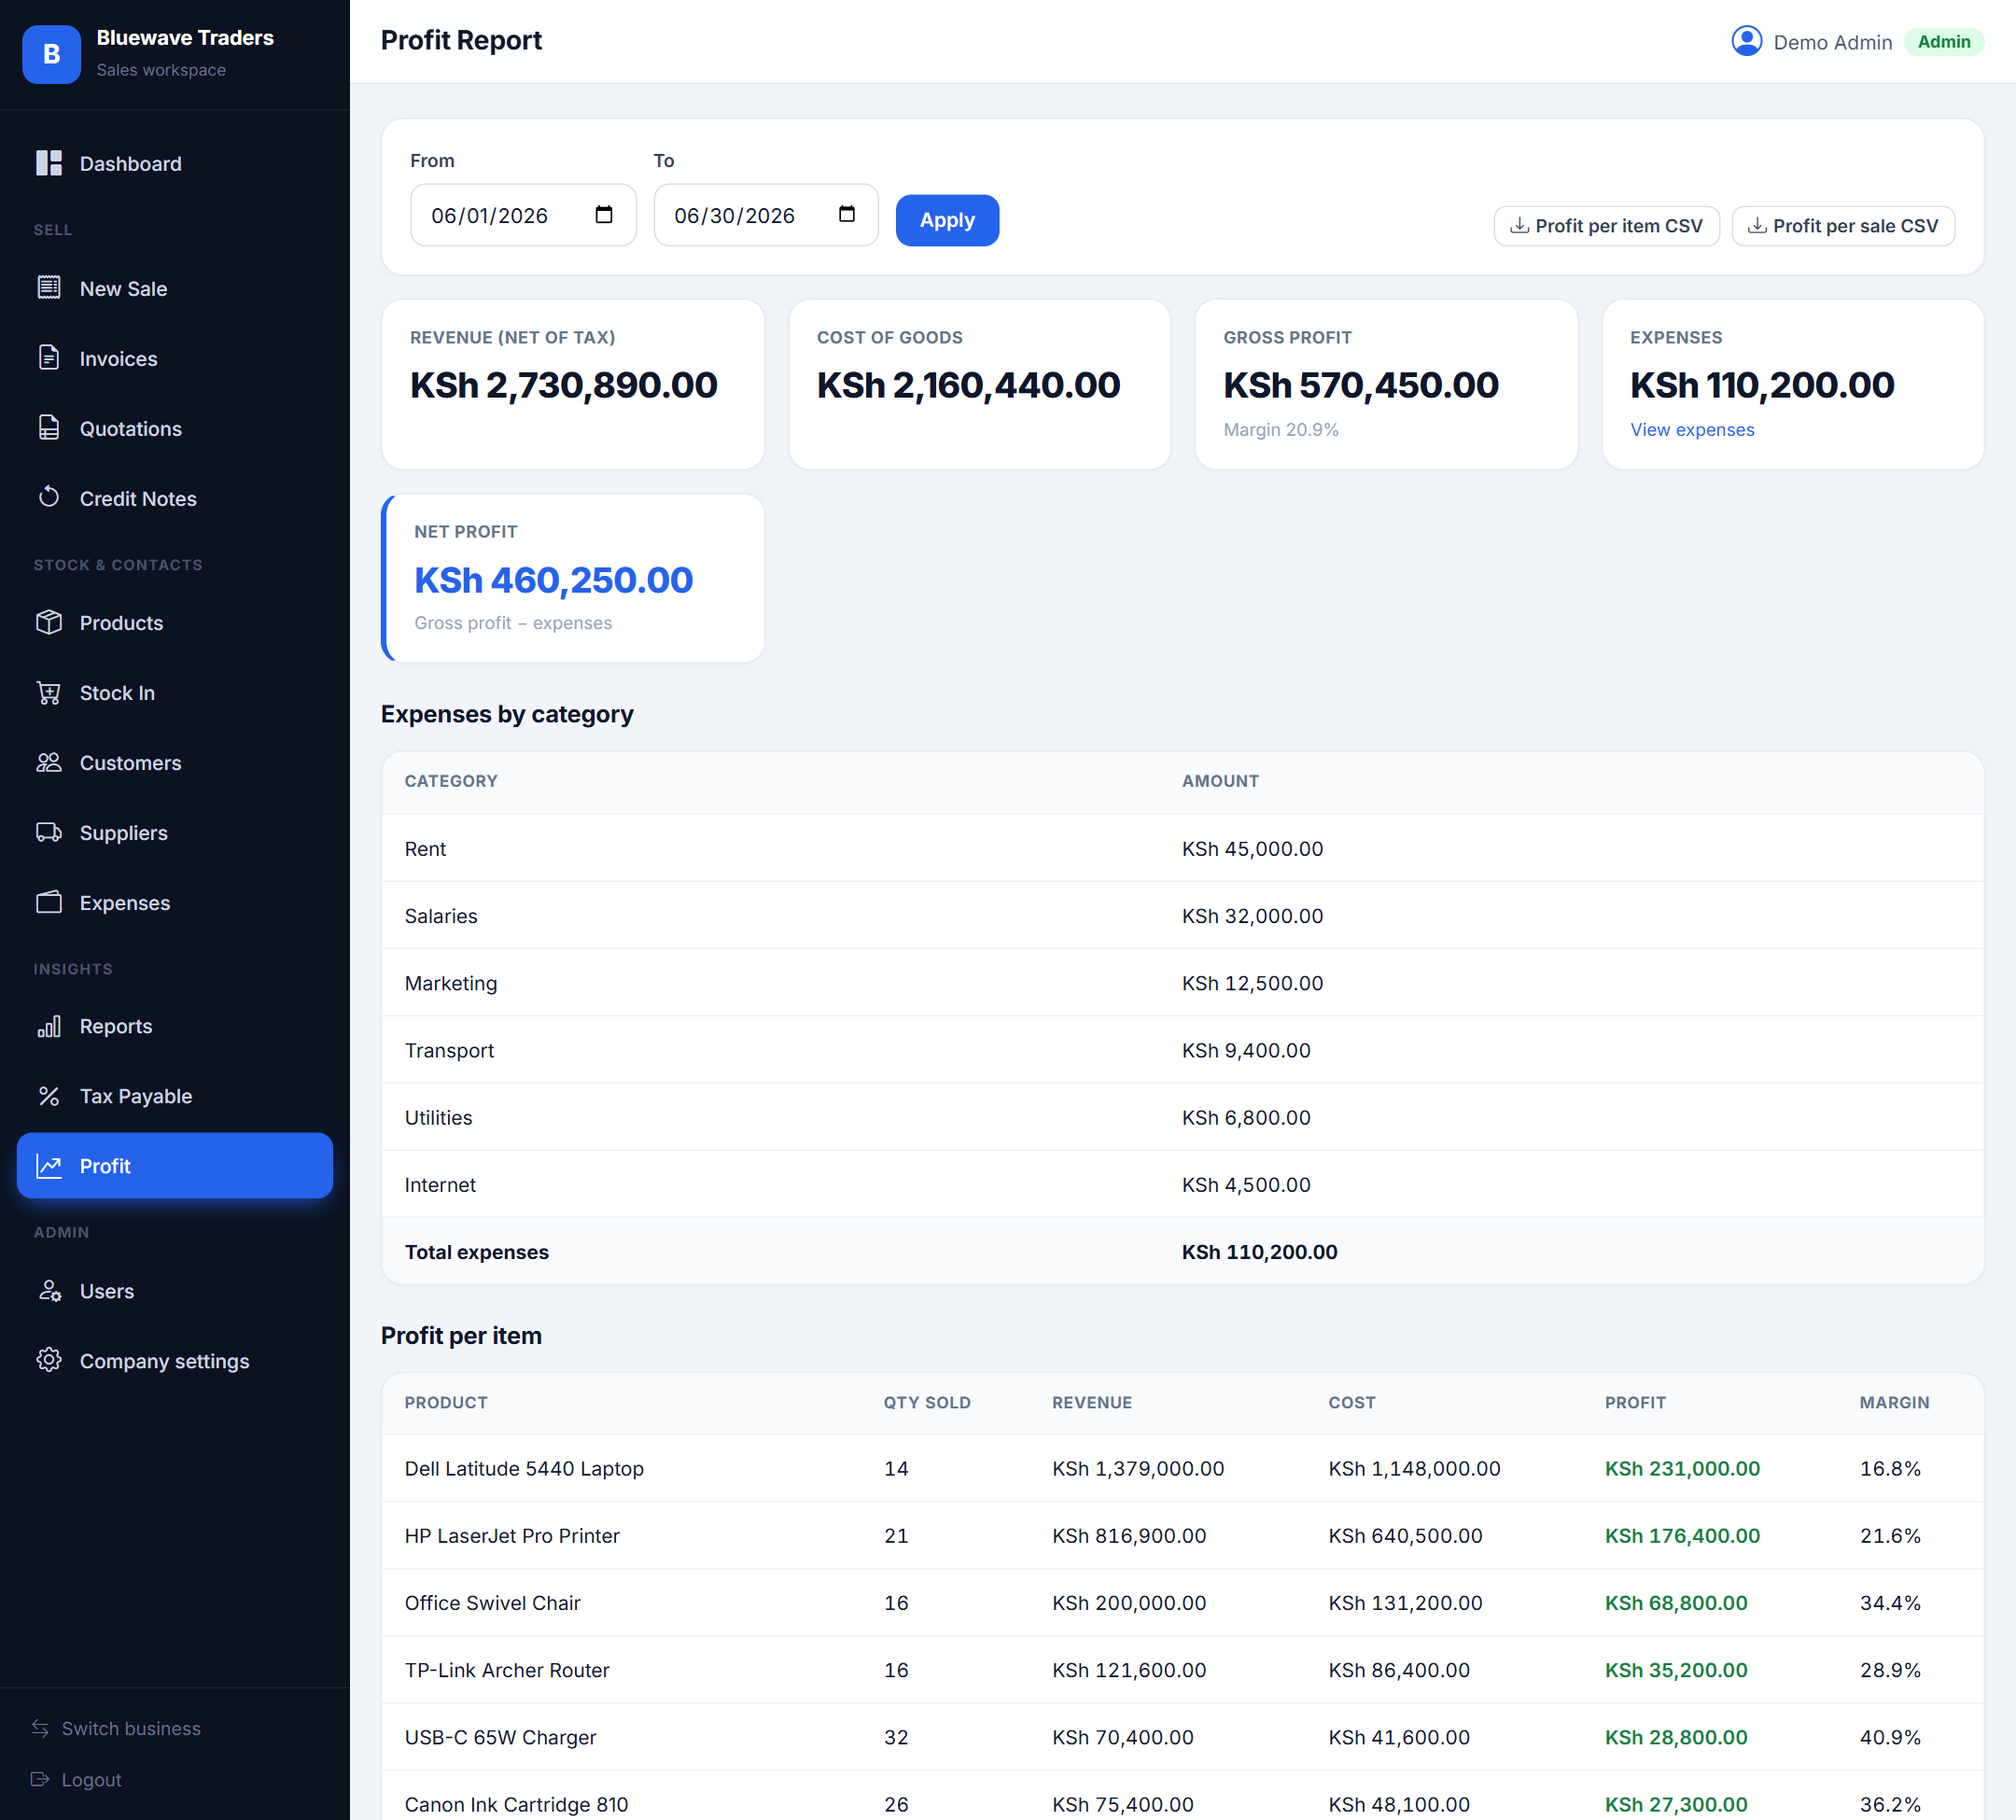
Profit (admin only)
True profitability after cost of goods and expenses.
The Profit report shows net revenue, cost of goods sold, gross profit and margin, then subtracts expenses to reveal net profit. It is restricted to admin users so sensitive margins stay private.
- Accurate product costs are essential for reliable profit.
- Only admins can open this report.
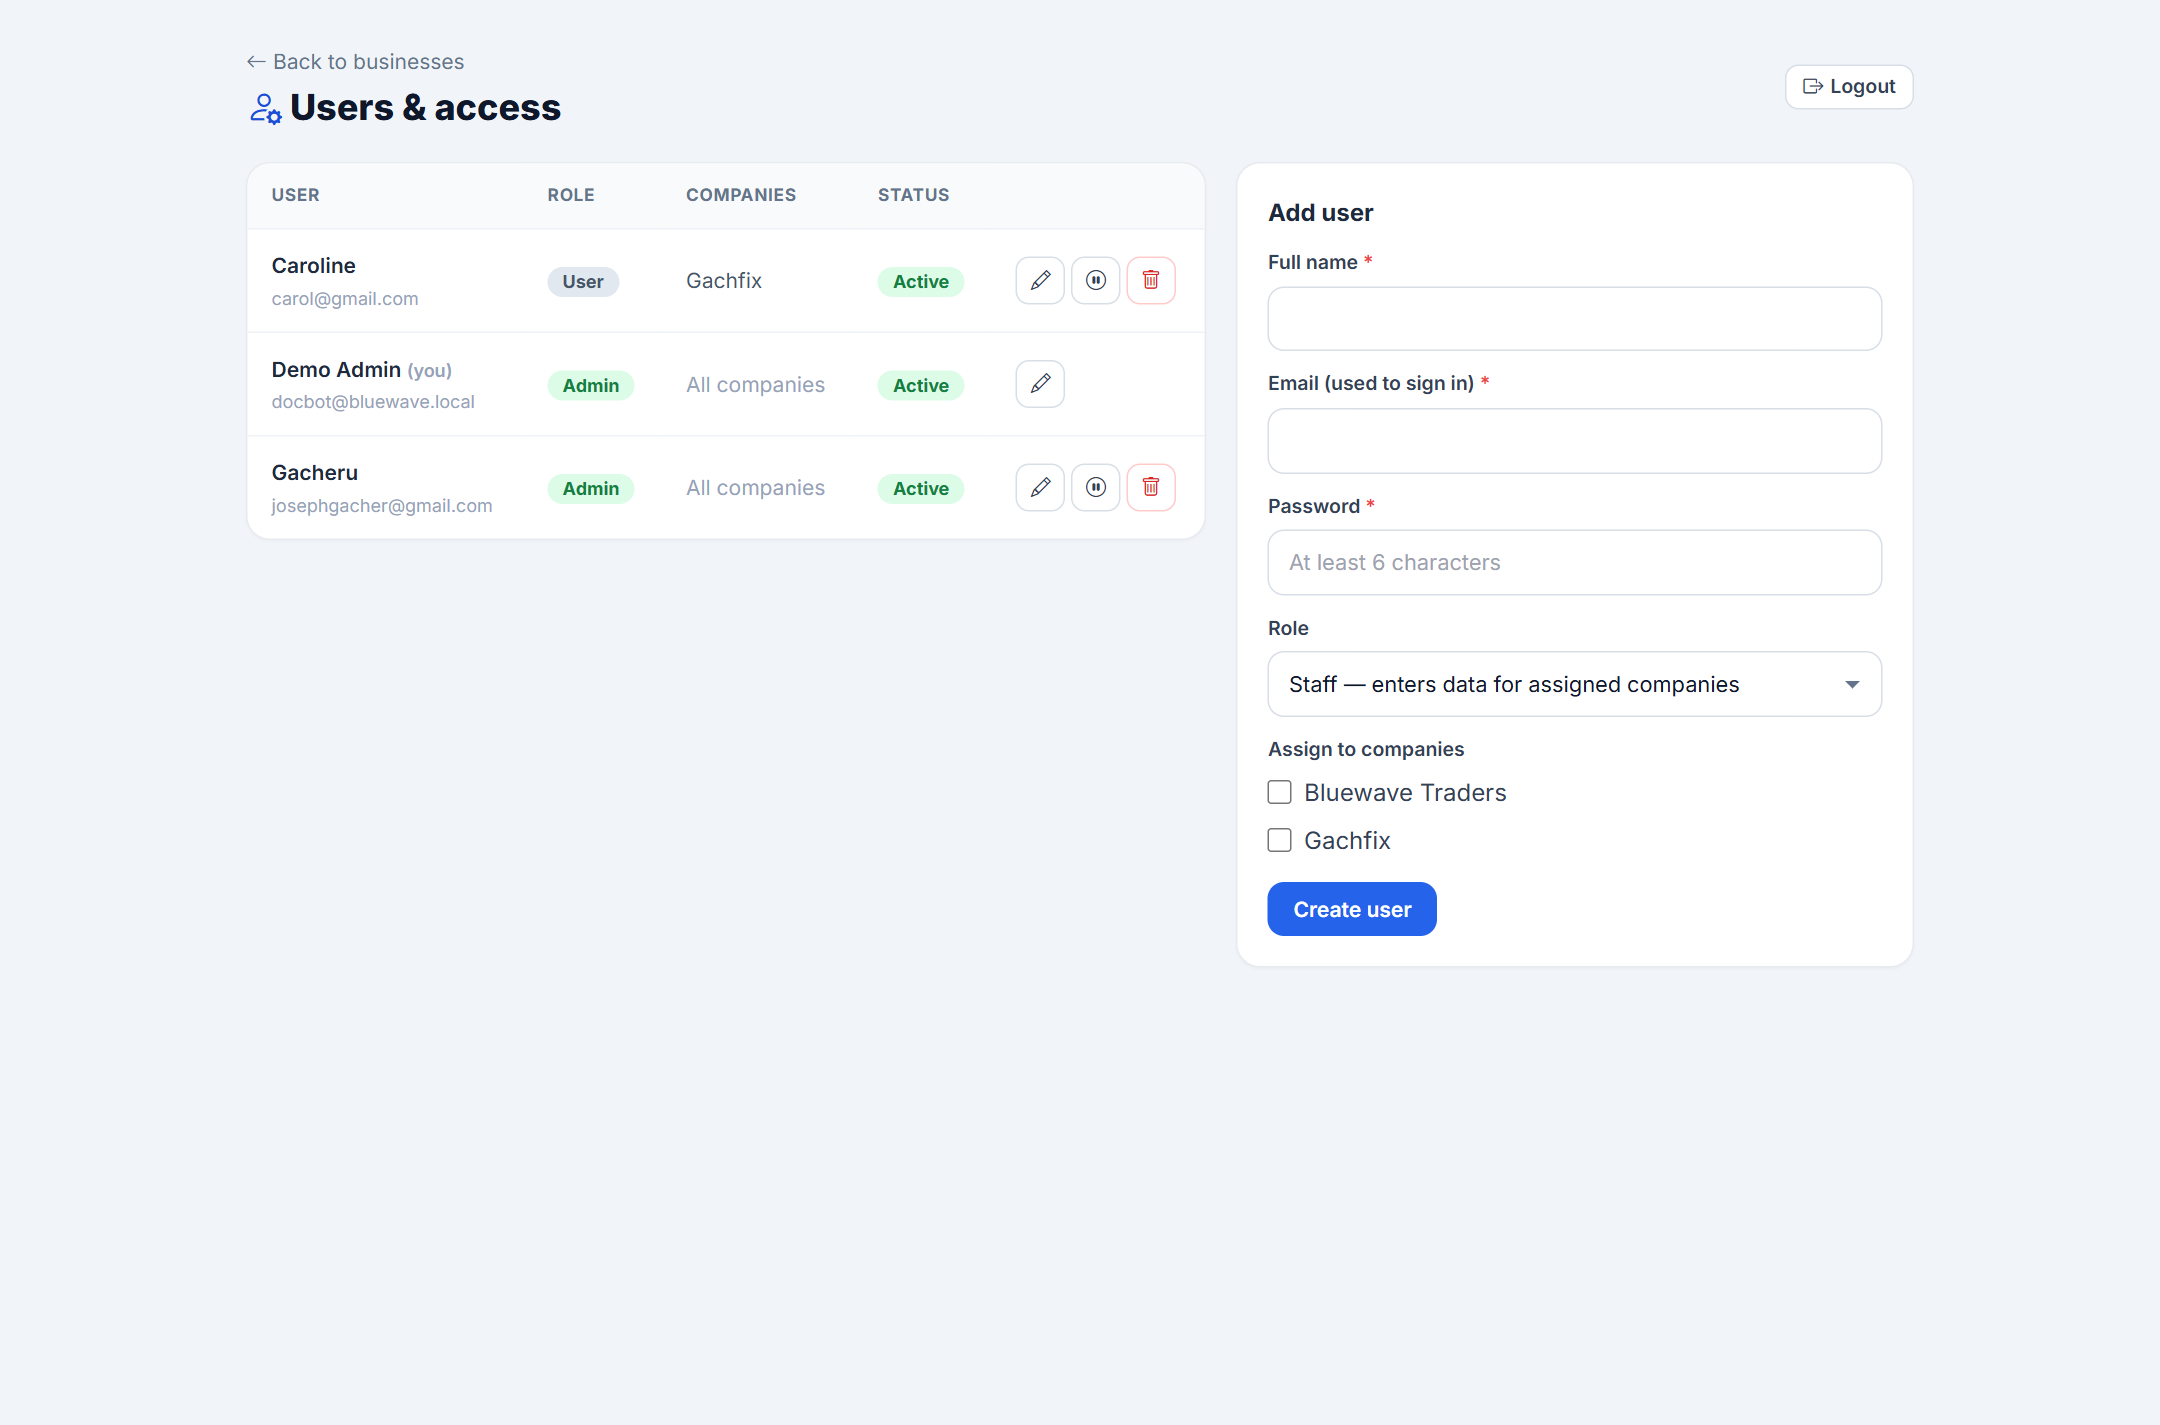
Users & access
Admins create accounts and decide who can reach which businesses.
From the Users area an admin can add staff, set roles (Admin or Staff), grant access to specific businesses, and disable accounts when someone leaves. Disabled users are signed out immediately and cannot log back in.
- Assign staff only to the businesses they work in.
- Disable rather than delete to keep historical records intact.
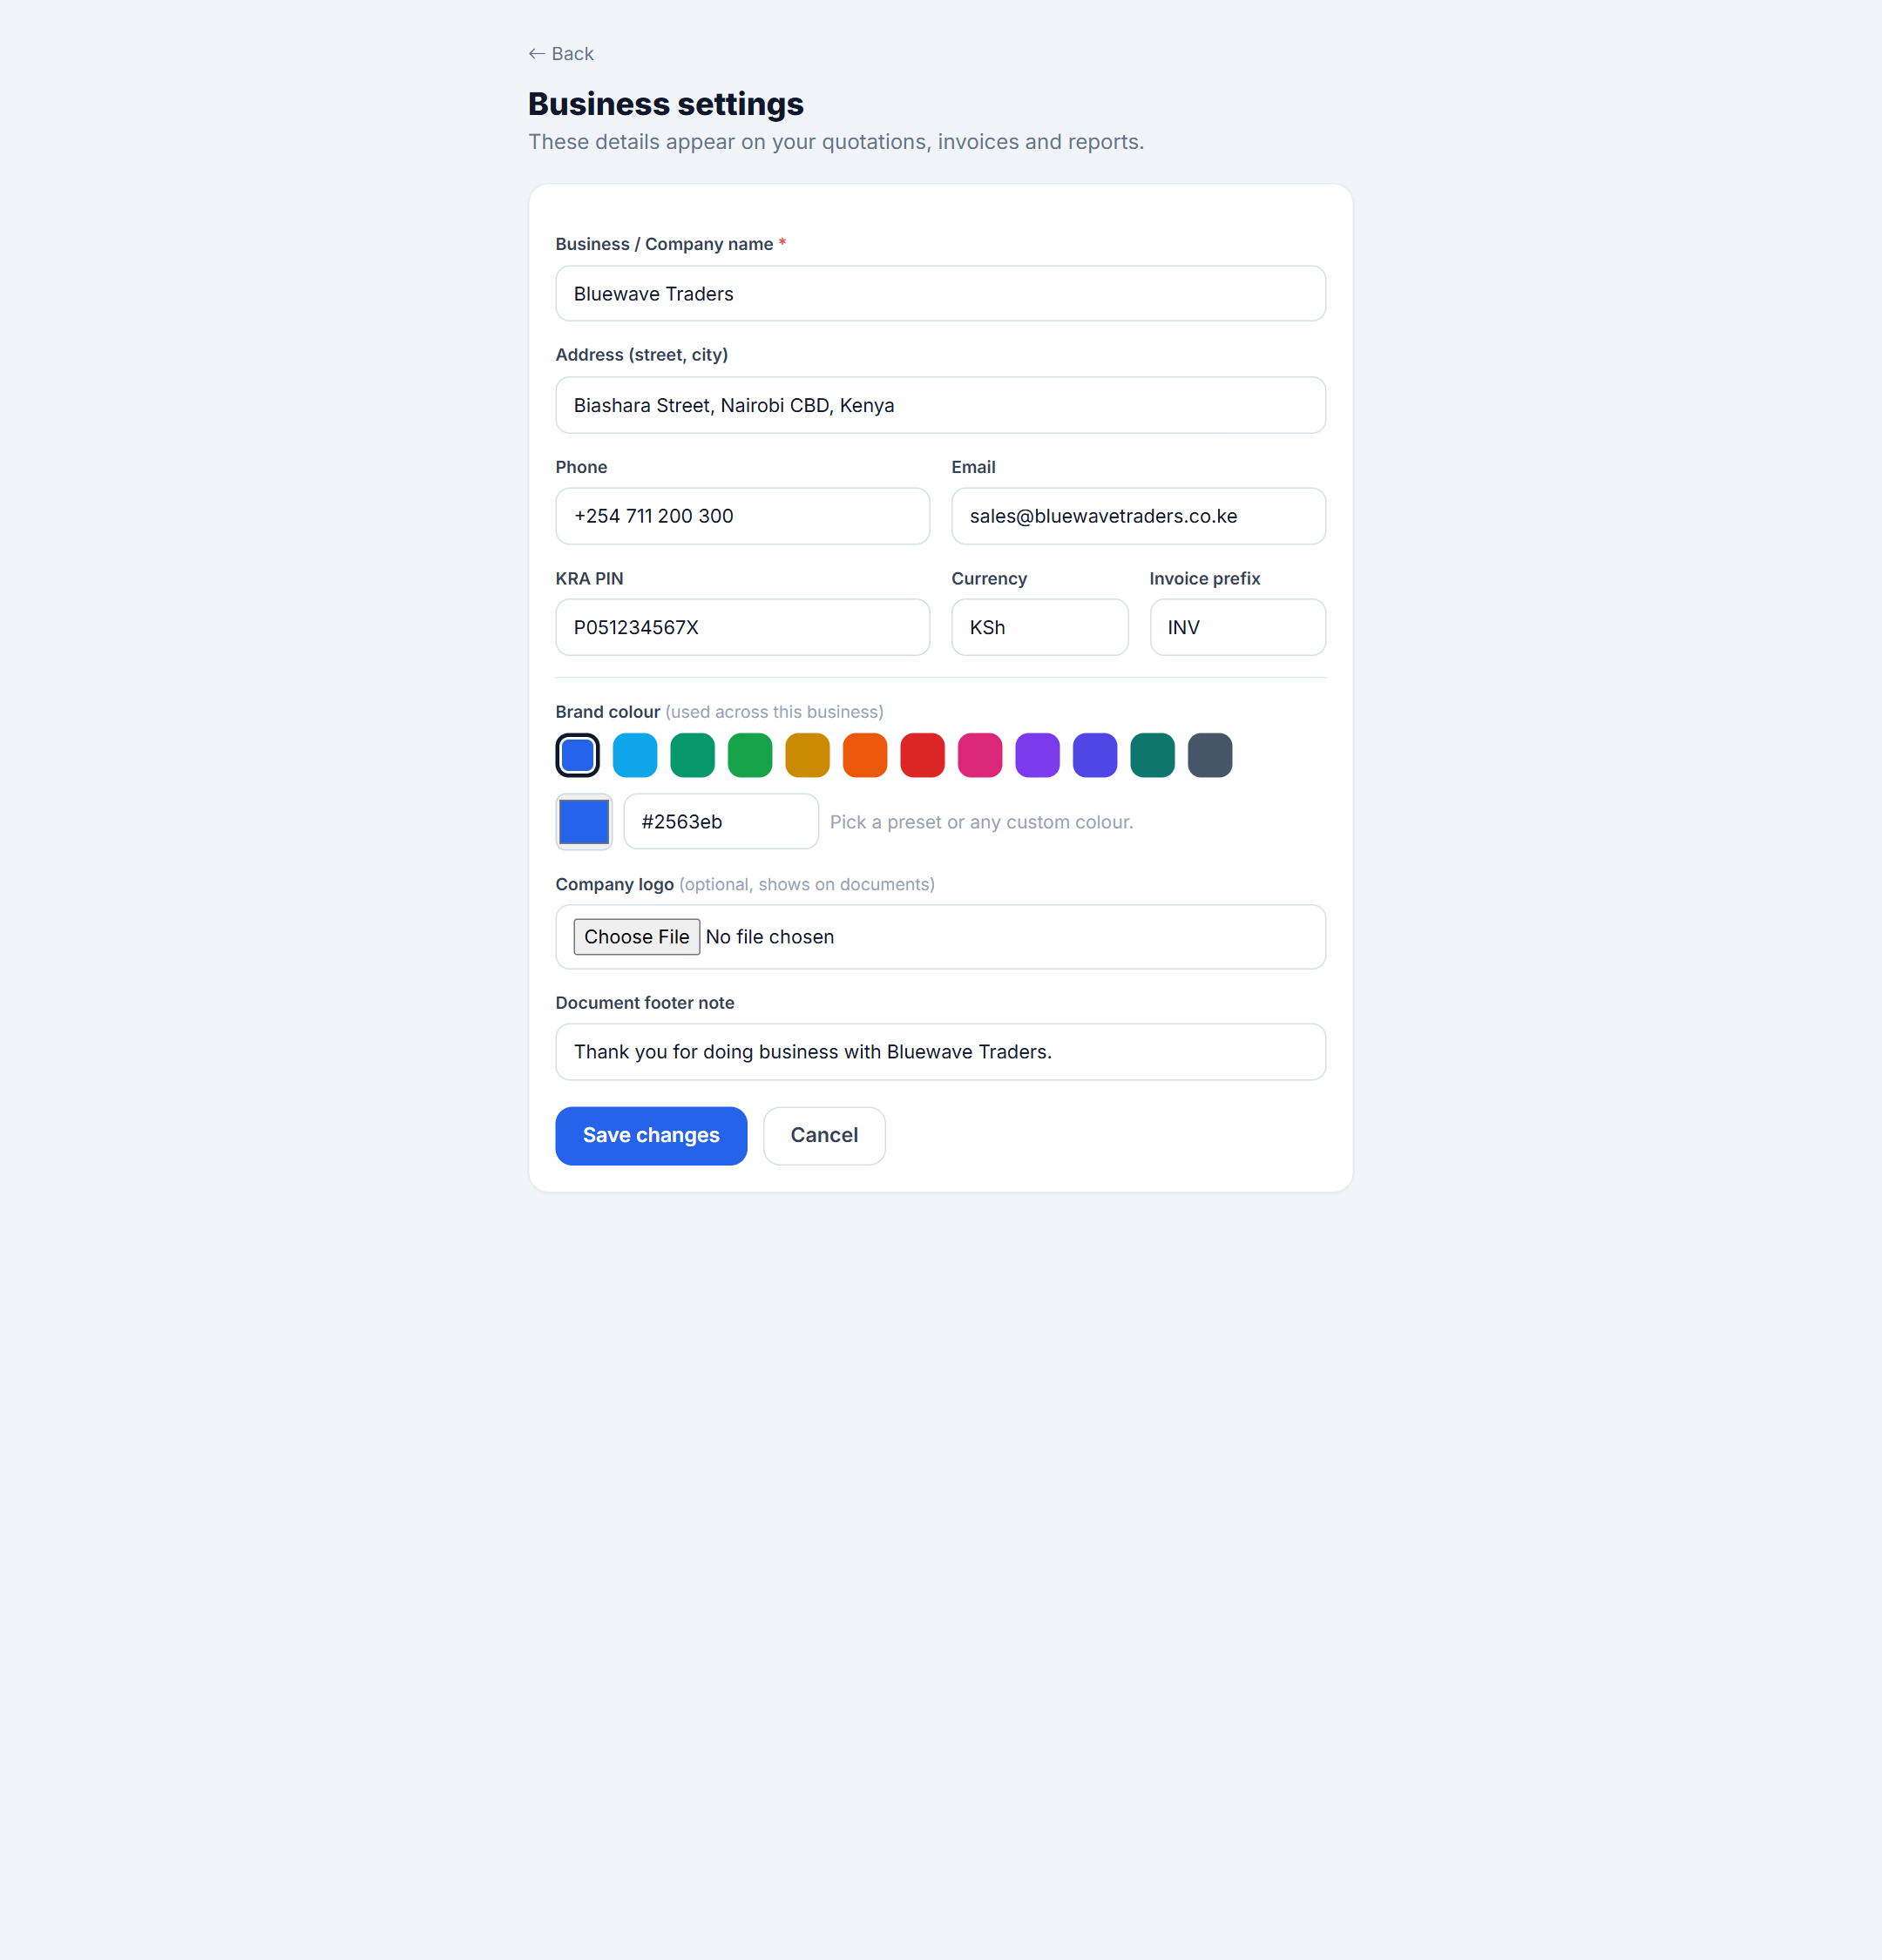
Company settings
Brand every document with your identity.
Set your business name, address, phone, email, KRA PIN, currency, invoice prefix and footer note, and upload a logo. Choose a brand colour and the whole workspace — plus your invoices and quotations — adopts it automatically.
- Your logo and KRA PIN appear on every printed document.
- The invoice prefix (e.g. INV) sets your numbering style.
That’s the whole tour
Ready to put it to work? Sign in to your workspace and start selling.